CJ Trowbridge
AI, Sustainability, and Resiliency; in the forest, in the desert, and on TV.
Support Me Directly:
Check Out My Etsy Store ☕ Buy me a coffee Venmo CashApp PayPal Eth Wallet
Support The Projects:
GoFundMe: Help Us Build An Outpost At The Grand Canyon
GoFundMe: Indigenous Solidarity & Endangered Species Gardens
GoFundMe: Help Us Build the Cyberpony Express
Connect:
TikTok Bluesky Mastodon YouTube Twitch Facebook Substack Blog
Resources:
Gear List:
Check out my Gear List for my recommended equipment for mesh networking, amateur radio/ fox hunting, and off-grid infrastructure.
Read My Theses:
- My graduate thesis in ethical artificial intelligence.
- MBA thesis on the future of datacenter strategy around artificial intelligence.
- My undergraduate thesis (Urban Planning Bachelors) on why building affordable housing isn’t affordable, and how to do it anyway.
Recent Longform Interviews:
- Dean Preson’s PUML is Punching Up
- Intelligent Machines with Leo Laporte
- The Verge: Chipwrecked by Elizabeth Lopatto
- CastroMedia: The Bay This Week - 2025-07-23
- Ethical artificial Intelligence with Future Infinitive and The Real Cornpop
- Communal Comms and Land Projects - SAD FRANCISCO
- Operational Security (OPSEC) - Artificial Intelligence and the Cyberpony Express Meshtastic Network
- Bulletin Board System, Multi-user Dungeons, Librarian Chatbot - Cyberpony Express Meshtastic Network
- Siting and Outreach - Cyberpony Express Meshtastic Network
- Hardware Strategy & Development - Cyberpony Express Meshtastic Network
- Tree Interviews The High Desert Institute Team
- “The Morning After The Revolution,” Interview with Tree and Julia
Academic Achievements:
- Graduate Studies @ SFSU:
- Undergraduate Studies @ SFSU:
- Undergraduate Studies @ Sierra College:
- ✔ Computer Science
- ✔ Sociology
- ✔ Social Justice Studies
- ✔ Women’s Studies
- ✔ Behavioral Science
- ✔ Natural Science (Astronomy & Physics & Chemistry)
- ✔ LGBT Studies and Queer Studies
See Also:
Current Projects
Multipurpose Apocalypse Sensors v4
Draft status: Working outline for active edits.
This draft lays out v4 of a modular sensor platform for off-grid monitoring, early warning, and community infrastructure diagnostics.
Why v4
In the last iteration, I added geiger counters and laser particulate sensors in order to study the realtionship between air quality and radiation levels. This was a fun project, but the lack of a proper Stevenson screen led to corrosion and damage over the last six years. Also, I have developed an interest in leveraging the bleeding edge forecast models which are available via satellite downlink, and the current platform is not powerful enough to handle the data processing requirements.
What’s New In v4:
- A fully 3d printed Stevenson-style enclosure with a modular design for easy maintenance and upgrades.
- A more powerful single-board-computer to handle more complex data processing and additional sensors.
- A GOES satellite receiver for real-time weather data and early warning capabilities.
- Meshtastic integration for local communication and public pattern change broadcasts.
- Continued support for:
Custom Enclosure
I have made great progress with my vibe modeling pipeline. This agentic framework knows how to design and iterate on 3d objects based on a chat interface. I simply explain what I want and it designs a printable 3d model. Then we discuss any issues and it designs a new one. It also learns and tracks the design history. This has been a real game changer for me, as it allows me to rapidly prototype and iterate on designs without needing to crawl through the process of using cumbersome 3d modeling software. The pipeline can simply directly use whatever software it needs to whatever process is required, with a holistic view on the overall plan and goals.
This design includes two pieces which will be printed upside down. The top of the enclosure will be a simple waterproof box measuring 200mm x 200mm x 100mm. This will contain all the electronics except for the sensors. The top of this print will be open.
The bottom piece will be the stevenson screen which follows the same layout as the first piece, but with recessed edges to allow the top piece to mount snugly. (Ensuring enough margin to allow it to slide together)
The bottom piece starts as a 200mm x 200mm x 100mm box with a hole in the center to allow wires and connections to pass through to the watertight electronics enclosure above. The sides of the box are louvered to allow maximum air flow while still providing protection from the elements. The top of the second print is also left open to allow for air flow while still providing protection from the elements.
When both pieces are done, they are inverted and assembled together. The top piece is slid into the bottom piece, creating a secure and weather-resistant enclosure for the sensors and electronics. The modular design allows for easy access to the components for maintenance and upgrades, while the Stevenson-style design ensures that the sensors are protected from direct exposure to sunlight and precipitation, allowing for accurate environmental readings.
Project Status
My 3d printer is down, pending some replacement parts. I have been working on the design and iteration of the enclosure using my vibe modeling pipeline, but I have not yet been able to print and test the physical components. I will update when I have the printer back up and running, and I can start testing the enclosure design and sensor integration.
Future Work
Precision Forecasting
I have been working for a while to figure out an easy way for communities to put together hyper-local forecasting models that build on things like the GOES forecasts and take advantage of older hardware which is still great for these kinds of tasks.
The resolution of something like the NOAA GFS model is 12 square miles. People want to know what’s happening in their neighborhood, not the average of a 12 square mile area. Who among us feels confident that they understand what “20% chance of rain” means for their block?
By using local sensor data to calibrate and adjust the forecasts, we can create hyper-local models that provide much more accurate and relevant information for communities. This could be especially valuable for things like flood forecasting, where local topography and infrastructure can have a huge impact on outcomes.
Convergence Analysis
There are lots of global forecast models out there, and they all have their own strengths and weaknesses. By observing all these models in parallel and over time, we can compare their outputs versus reality. This lets us identify areas of agreement and disagreement, which can help us understand the underlying uncertainties and improve our forecasts.
There is a kind of fluid and moving boundary in the forecasts between short-term consensus and longer-term hallucination. By tracking this boundary as it moves and changes, we can get a sense of how much confidence to place in the forecasts at any given time.
For example, if all the models are in agreement for the next 24 hours, we can be more confident in the forecast for that period. However, if the models start to diverge after 48 hours, we know that there is more uncertainty in the forecast beyond that point.
This kind of convergence analysis can be a powerful tool for improving the accuracy and reliability of our forecasts, especially in complex and rapidly changing situations.
Inspiration
- I found this Stevenson screen design which is pretty similar to the bottom half of the design I want to build. Also, it’s already in OpenSCAD so I will give it to the vibe modeling pipeline as an example of a similar project to take inspiration from.
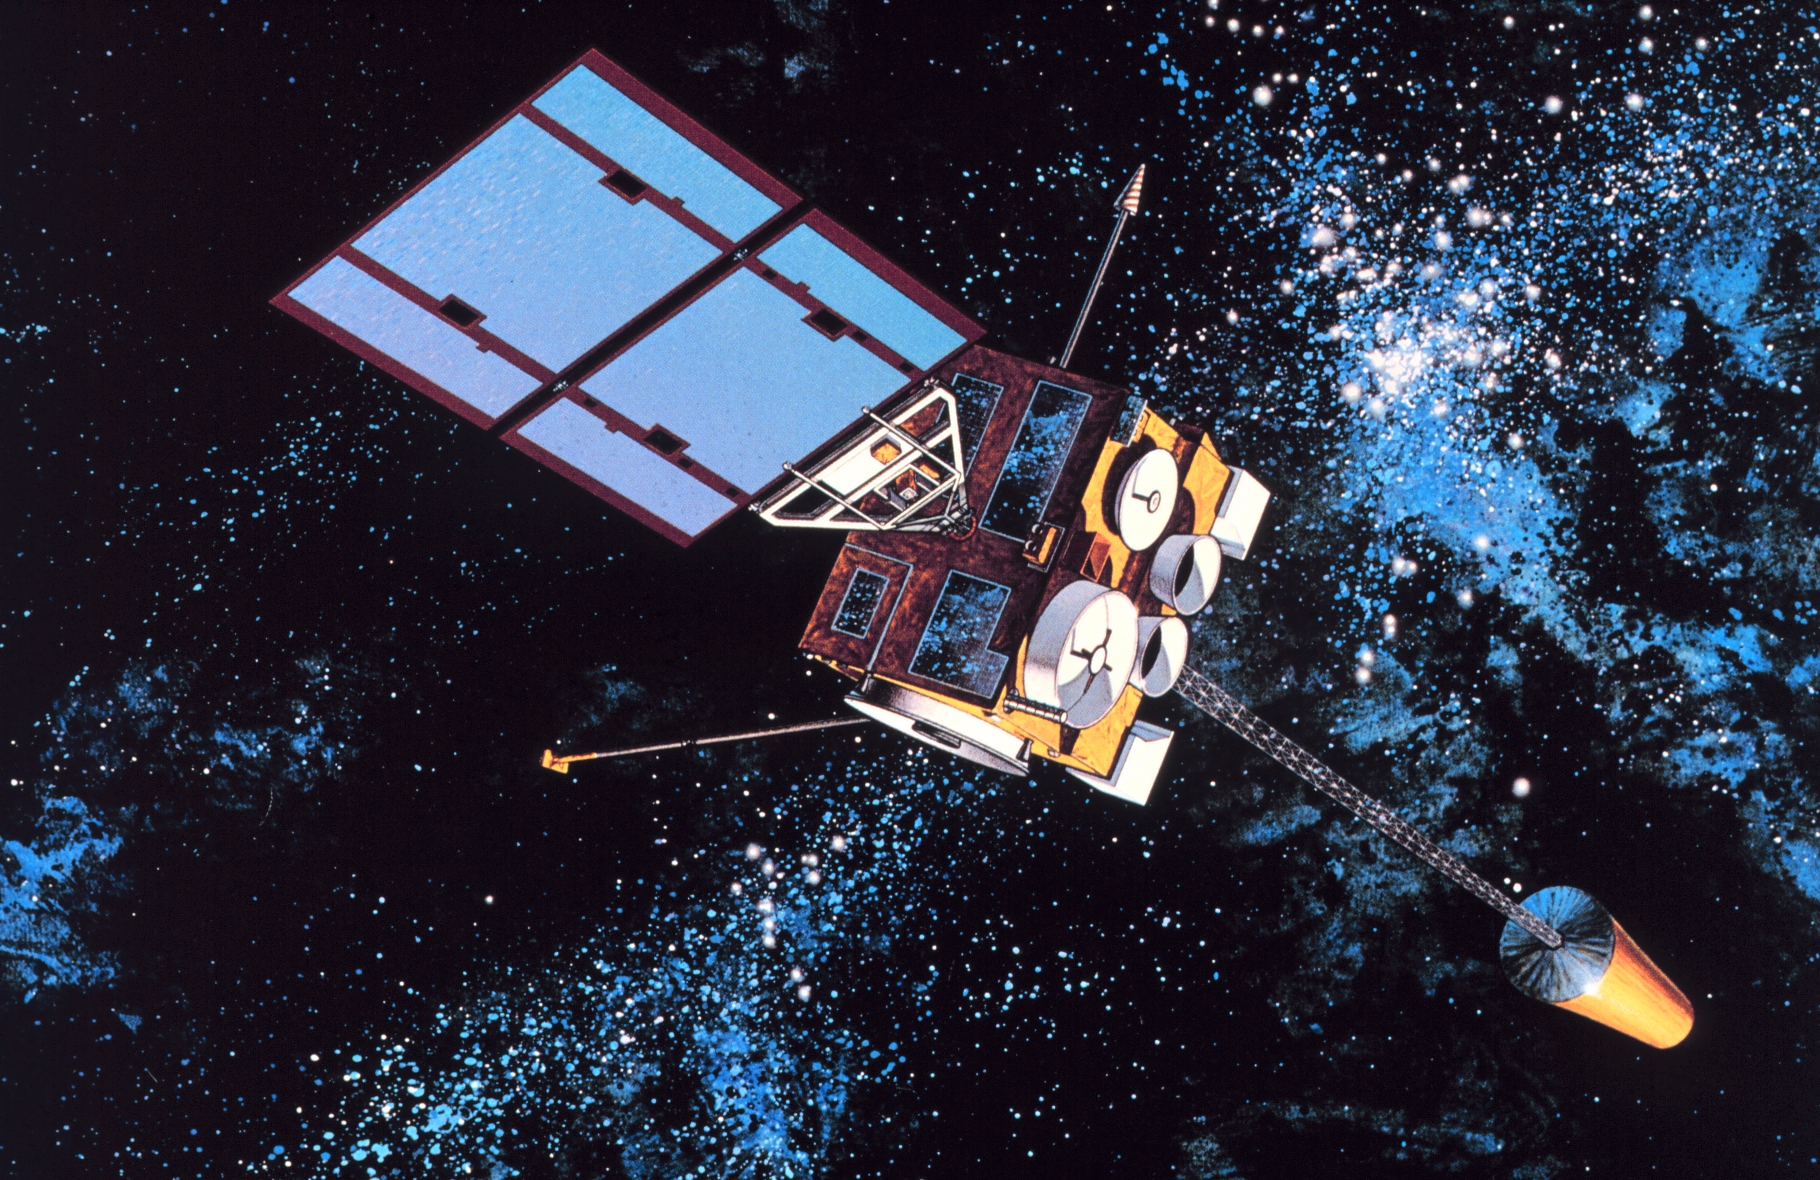
Stationary 3D-Printed helicone Weather Satellite Uplink
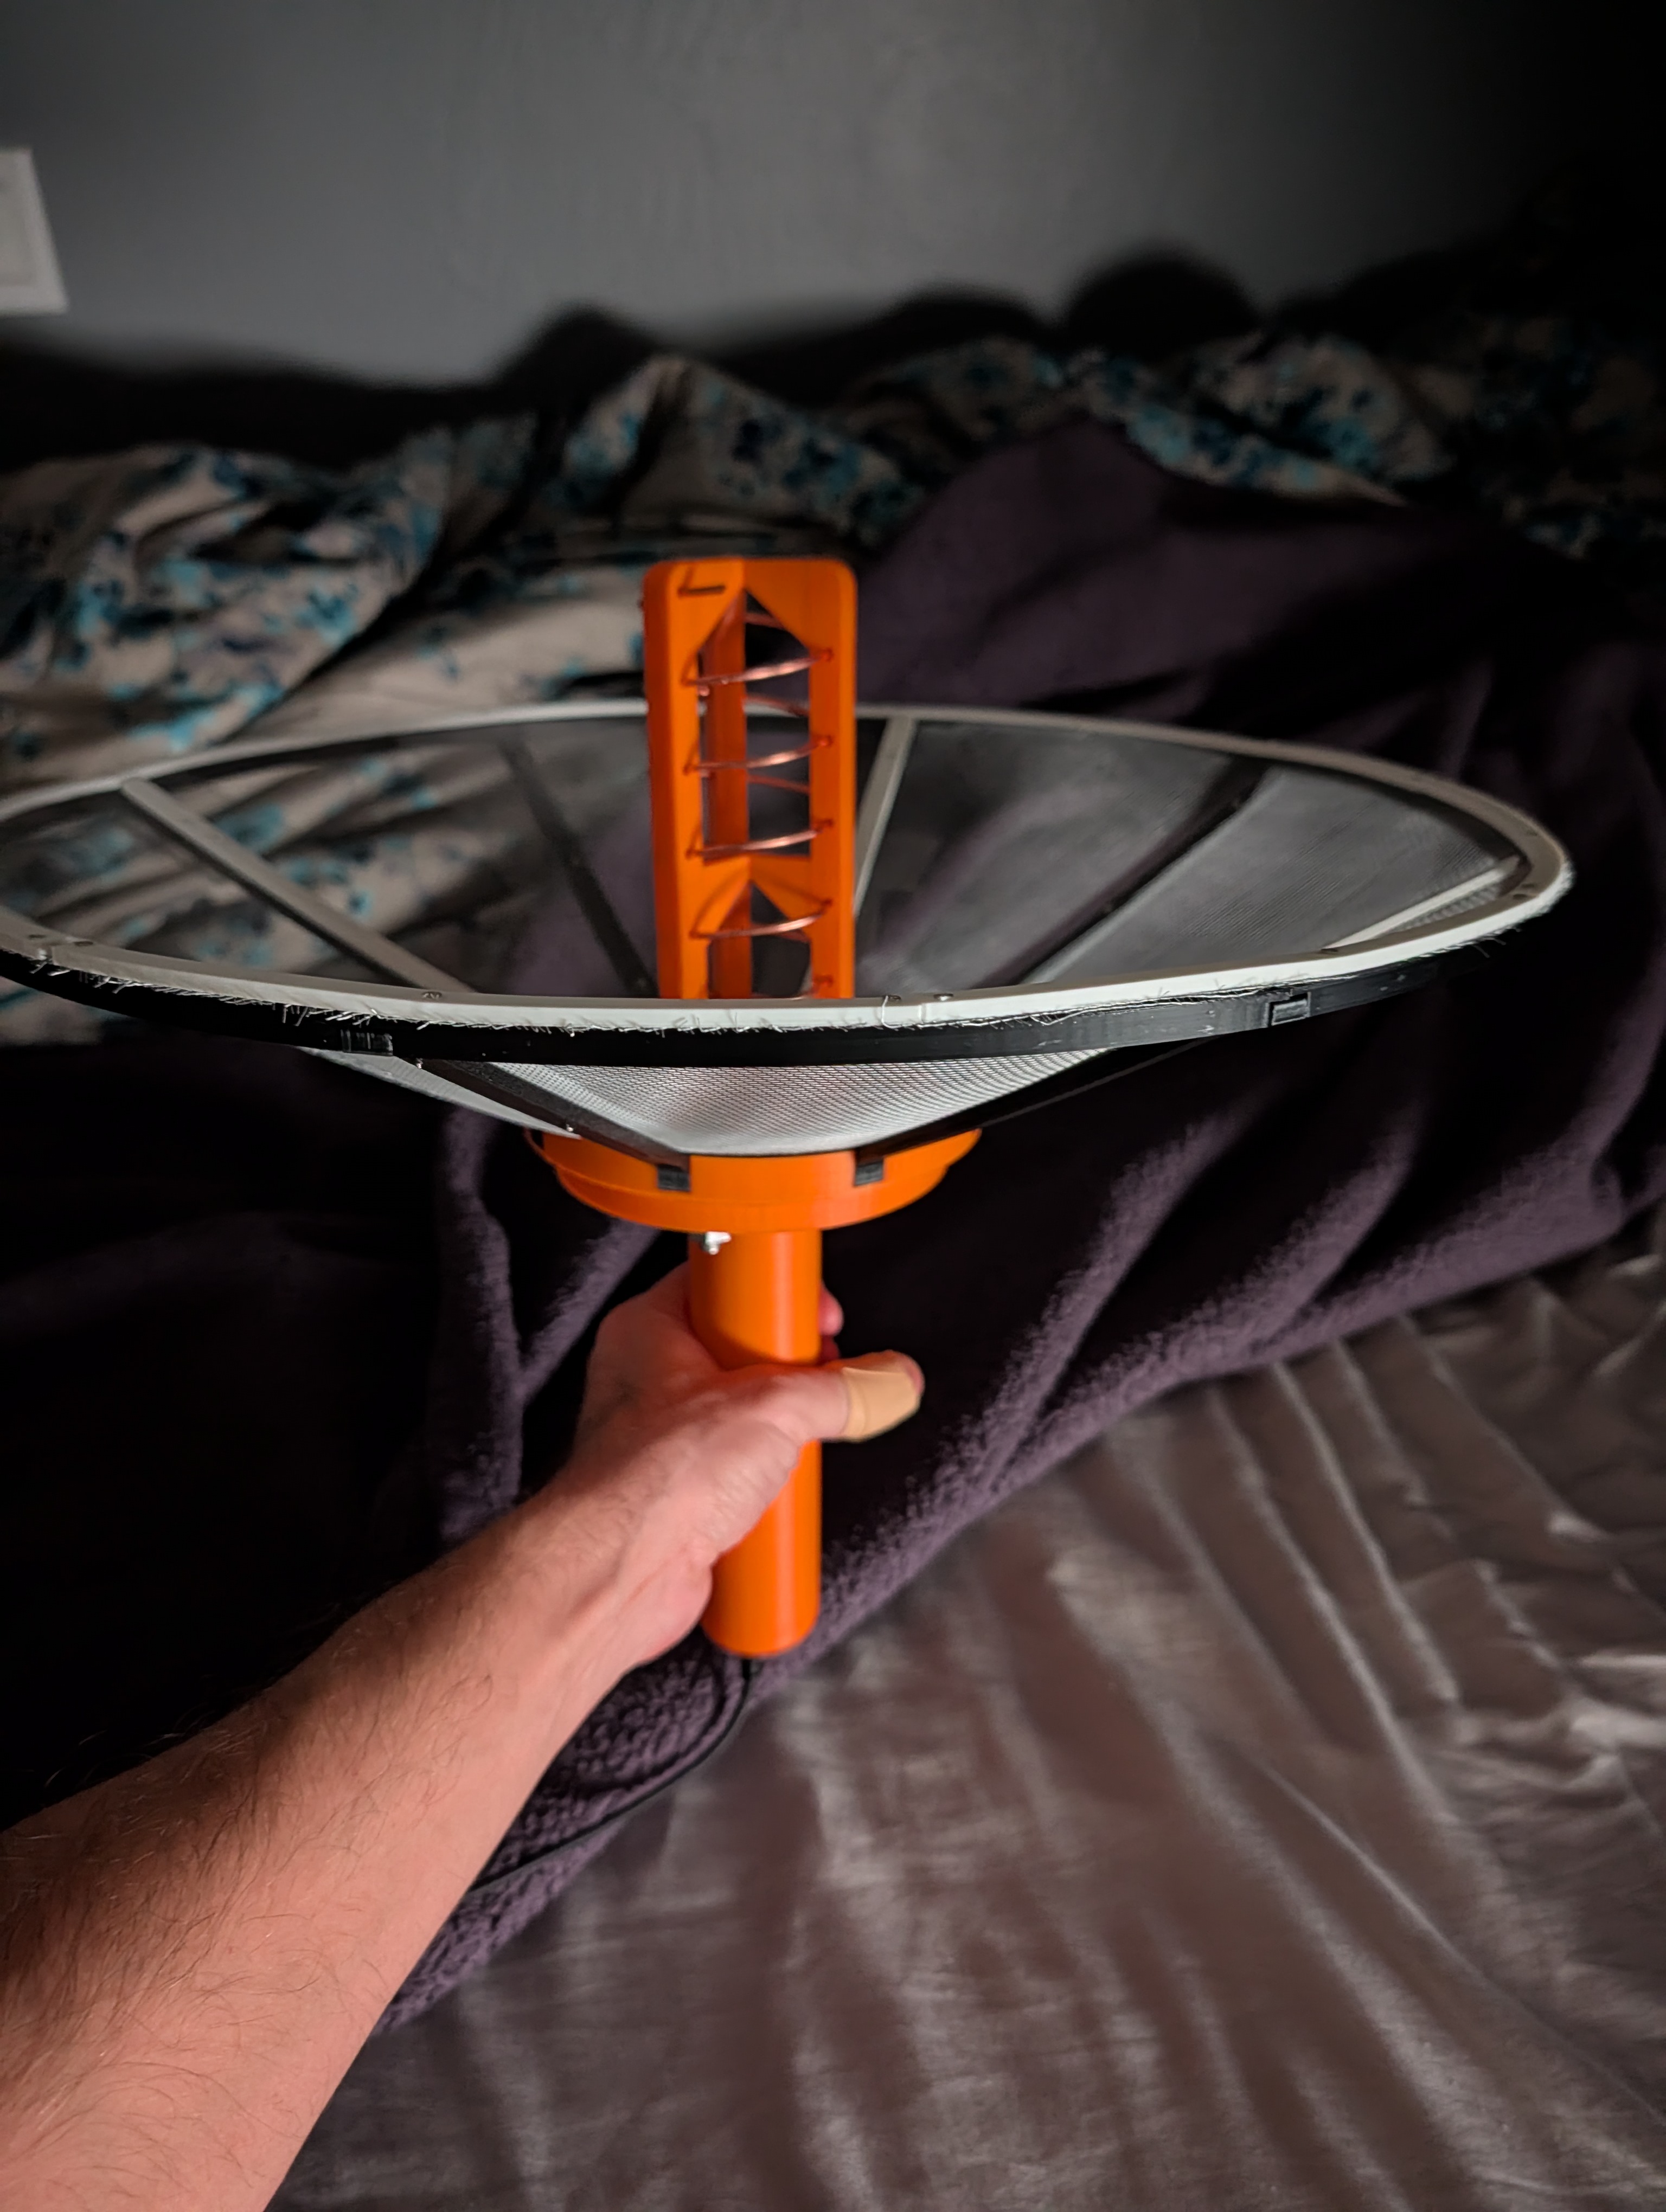
- *Feed type: Helicone (3D-printed)
- Reflector type: Parabolic dish (Aluminum Window Screen)
- Alignment mechanism: Stationary (fixed mount after initial pointing)
This is an uplink for connecting to the GOES weather satellites using a 3D-printed helicone feed antenna with an integrated parabolic dish reflector and LNA. The helical feed is designed to be mounted on a fixed, stationary mount that is manually pointed at the satellite. This allows me to receive real-time weather forecasts, photography, and emergency alerts directly from space without needing an internet connection.
The Project
I wanted to try duplicating the popular open-source Helicone project as a baseline reference to test my other ideas against.
This is the 3d model.
If you don’t want to 3d print this one, you can also buy a GOES antenna that’s ready to go, but the feed will not be as good as the 3d printed one.
Here is the parts list:
- Solid-core 6mm^2 copper wire for the helicone elements. I used 6mm^2 because it is the closest standard size to the ideal diameter for the GOES frequency.
- SMA flange to mount the feed to the dish and connect the LNA.
- M8 bolts, nuts, and washers to secure the feed to the dish.
- Assorted self-tapping M2 screws
- Special Low Noise Amplifier (LNA) designed for the GOES satellite frequency.
- RTL-SDR dongle to receive the satellite signal.
- Raspberry Pi Zero 2W to run rtl_tcp and stream data to my main computer, running SatDump and goestools
- Battery pack For Raspberry Pi to power the receiver in the field. These are great.
- Memory card For Raspberry Pi to store the OS and software.
Software
- Raspberry Pi OS Lite for the Raspberry Pi Zero 2W.
- rtl_tcp to stream the raw IQ data from the RTL-SDR to my main computer.
- SatDump to decode the IQ data and extract the weather data and images from the GOES satellite signal.
- goestools for additional processing and analysis of the GOES data.
Other examples
This 3D-Printed Satellite Antenna Is Fantastic!
3D Printed Yagi
There was another popular community design for a linear-polarized yagi antenna which the community iterated on and improved over time. The yagi is only about half as good as the helicone because it doesn’t have the right polarization, but it’s much easier to make and can fit inside the small robotic rv dishes which are much easier to find and work with than the large parabolic dishes. It still needs a filter and low-noise amplifier (black) connected immediately after the feed to be able to receive the signal and send it on to the software defined radio (silver), but it’s a great option for a smaller feed that will fit in those small domes that go on the roof of rv’s and boats.
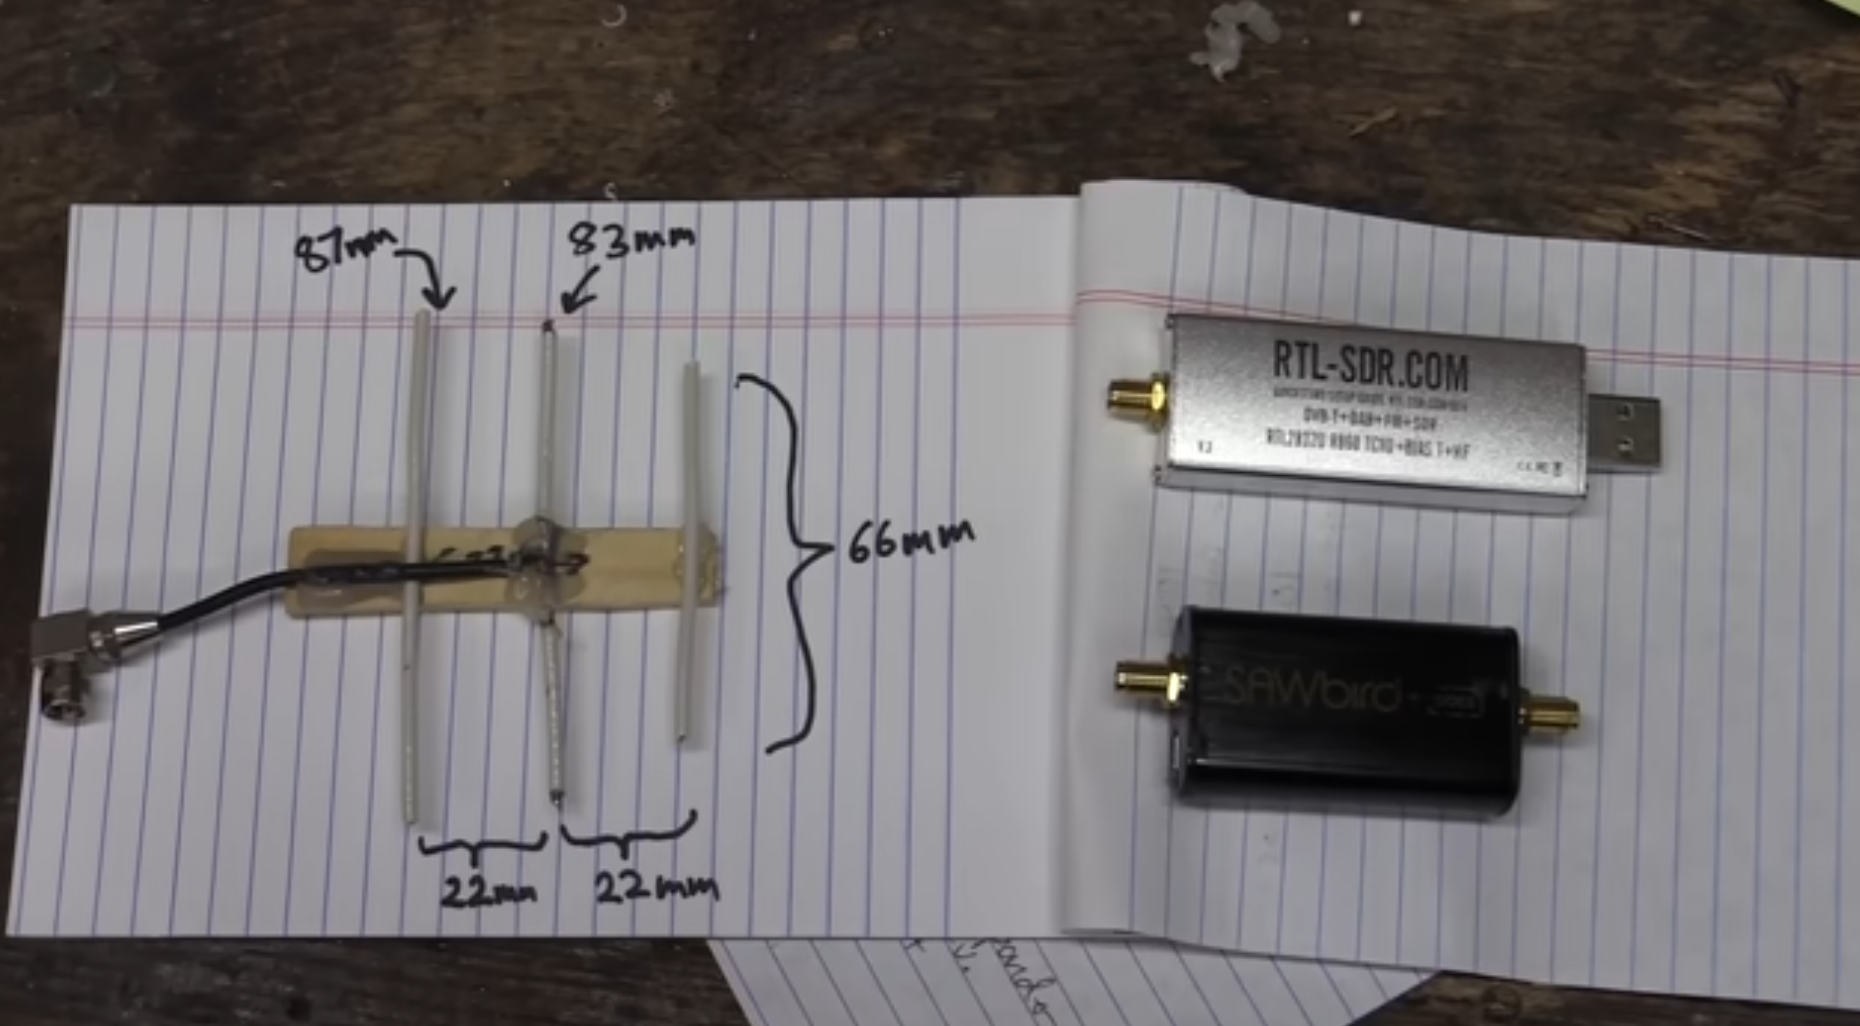
My 3D Printed Version
The math behind making a yagi antenna is complex and I have absolutely no understanding of how that works. I gave the photo above to an LLM and asked it to research and find all the information to explain why this feed is so effective. It’s actually a counter-intuitive design. The first thing you will notice is that the front element is too short. normally, the elements in a yagi are closer to the same length. It turns out, the community discovered that being at the focal point of a dish, this approach is more effective at focusing the signal than a more traditional yagi design. One common pitfall with yagis is that the elements can bend, especially when you’re using copper wire that comes ina coil. My idea was to 3d print a “negative” of the antenna so I can just drop all the lengths of copper wire into the grooves and hit them with some hot glue to hold them in place. This worked really well and made it much easier to get the elements in the right place, aligned perfectly, and keep them from bending.
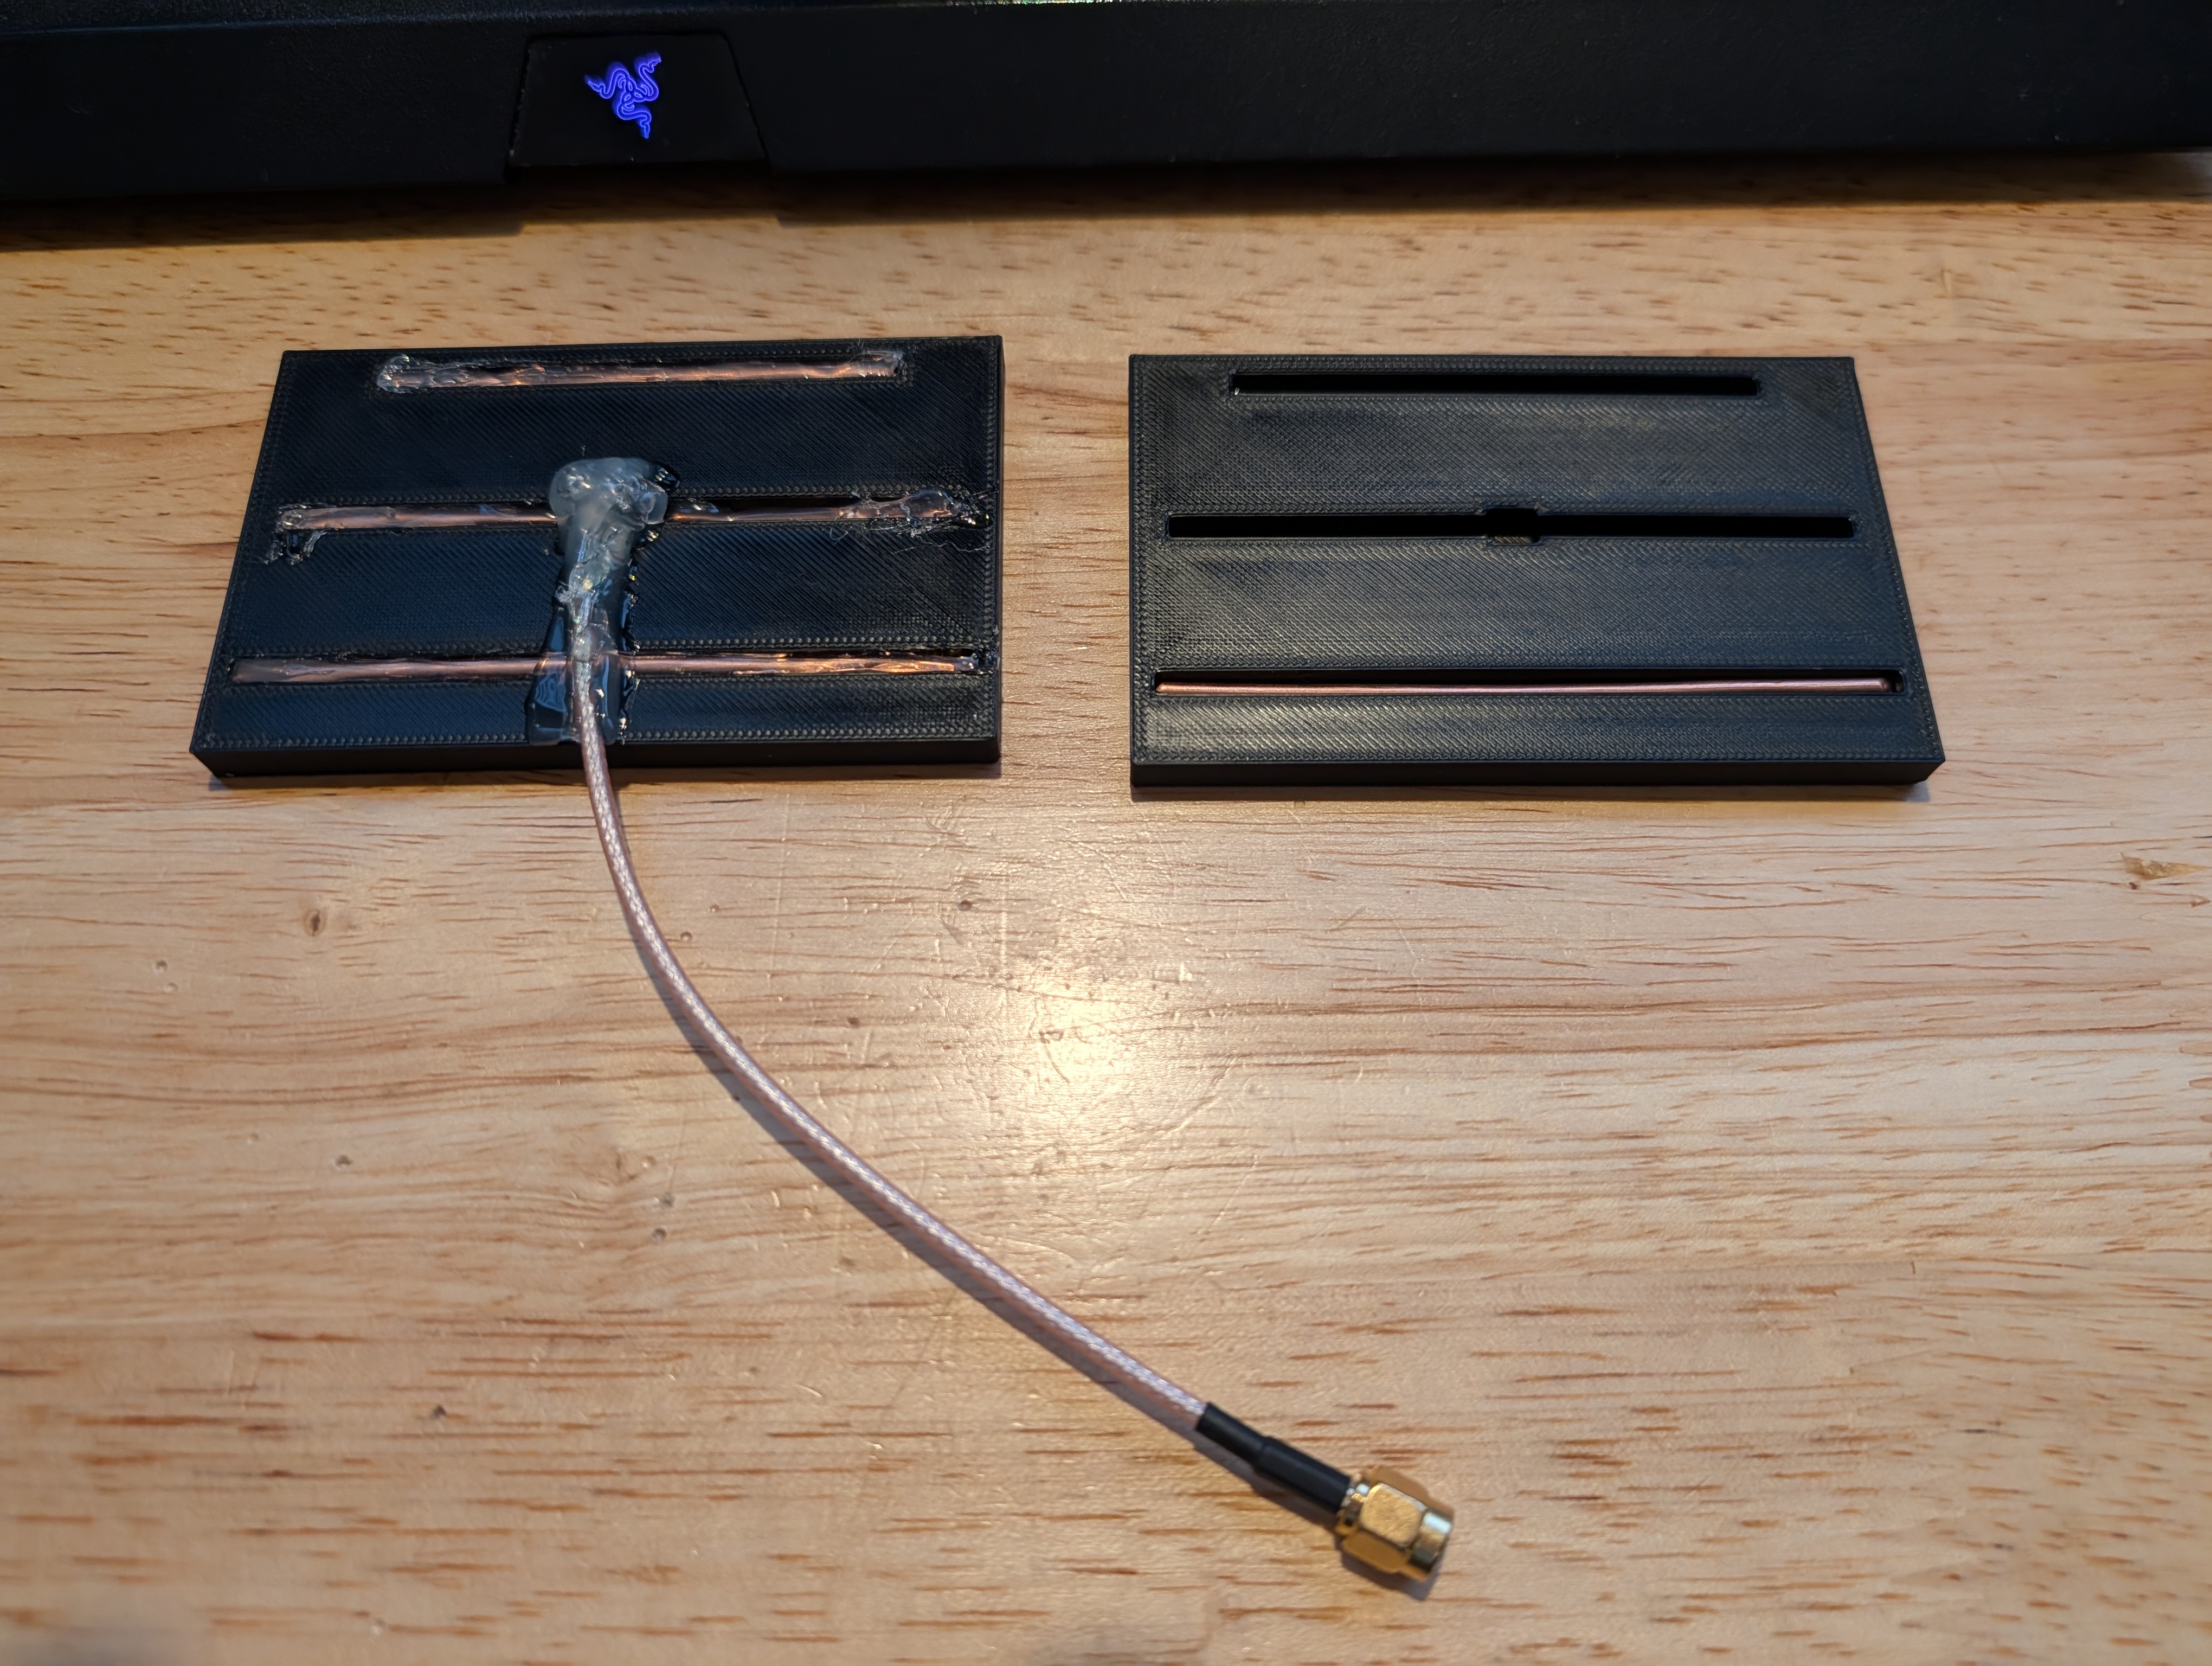
If you’re interested in my pipeline or artifacts for the 3D printed yagi antenna which isn’t as good as the helicone but much easier to make and much more versatile with being able to fit inside the small robotic rv dishes, you can check out the 3D printed Yagi project
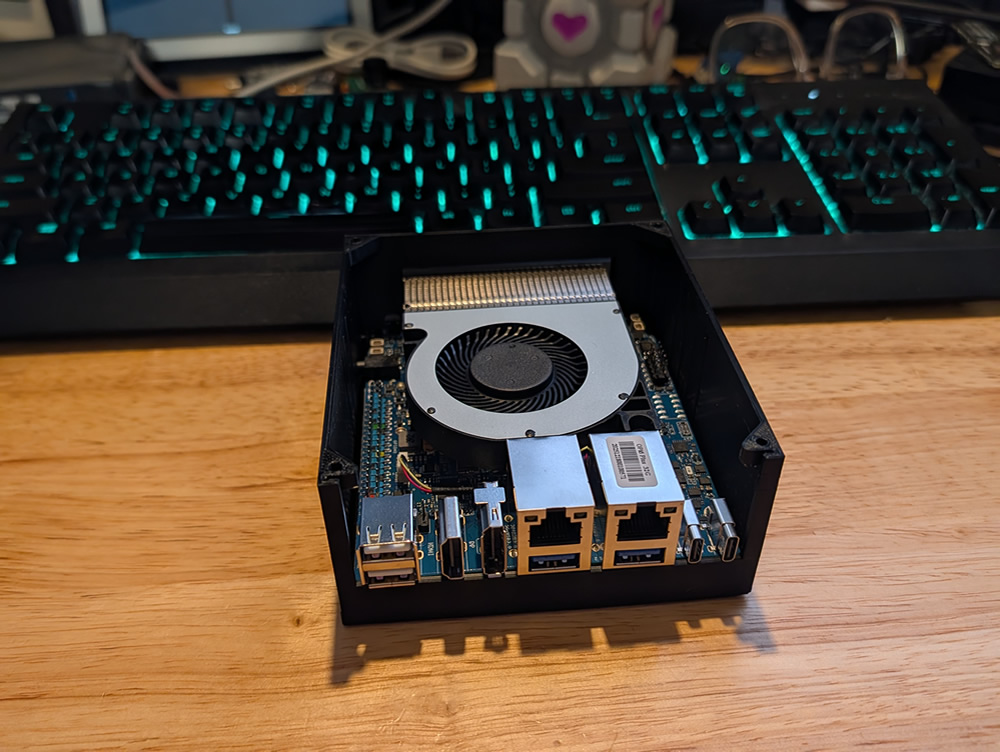
32GB-DDR5 Ollama Server Based On OrangePi 6+
I built a compact local LLM server based on an Orange Pi 6+ with 32GB DDR5, running Ollama for offline inference and tooling.
Goals:
- Small and power-efficient
- Quiet enough to live on a shelf
- Simple deploy + updates
- Optional NVMe storage
Parts List
- Orange Pi 6+ (32GB DDR5)
- 3D Printed Case
- Evo SD Card These are fast and reliable for the OS. You can also use an NVMe drive for storage, but disk speed is really not as big of a bottleneck as RAM for LLM inference, so I went with a large SD card for simplicity.
Process
- Assemble Hardware: Install the Orange Pi 6+ into the 3D printed case, ensuring proper cooling and access to ports. I am leaving the top off because it looks cooler. 😎
- Install Ubuntu Server for Arm: available here
- Setup Docker and Ollama: I put this simple script together which does all the work for you.
- Connect Client: Here are some of the most popular clients for connecting to your Ollama server:
- OpenWebUI A web interface just like ChatGPT, but self-hosted and customizable.
- LM Studio A desktop app for managing and chatting with your local LLMs. You can connect it to your Ollama server or use it locally on your machine.
- Ollama CLI
- Ollama Python SDK
- Ollama Web UI
Whisplay Chat Bot Build List
Building a chat bot for Whisplay. This will let you create a portable AI assistant which understands your voice, runs what you say through a large langauge model, and then replies with voice. The “Good” model takes a few seconds between each step to reload the next model. The “Better” model is much faster but requires additional hardware. These are affiliate links.
You have two options, and if you start with the “Good” option you can always upgrade to the “Better” option later. It’s as simple as adding the extra hardware and flashing a new image to your MicroSD card.
The Original Setup: Pretty Good.
My video explaining the basic setup
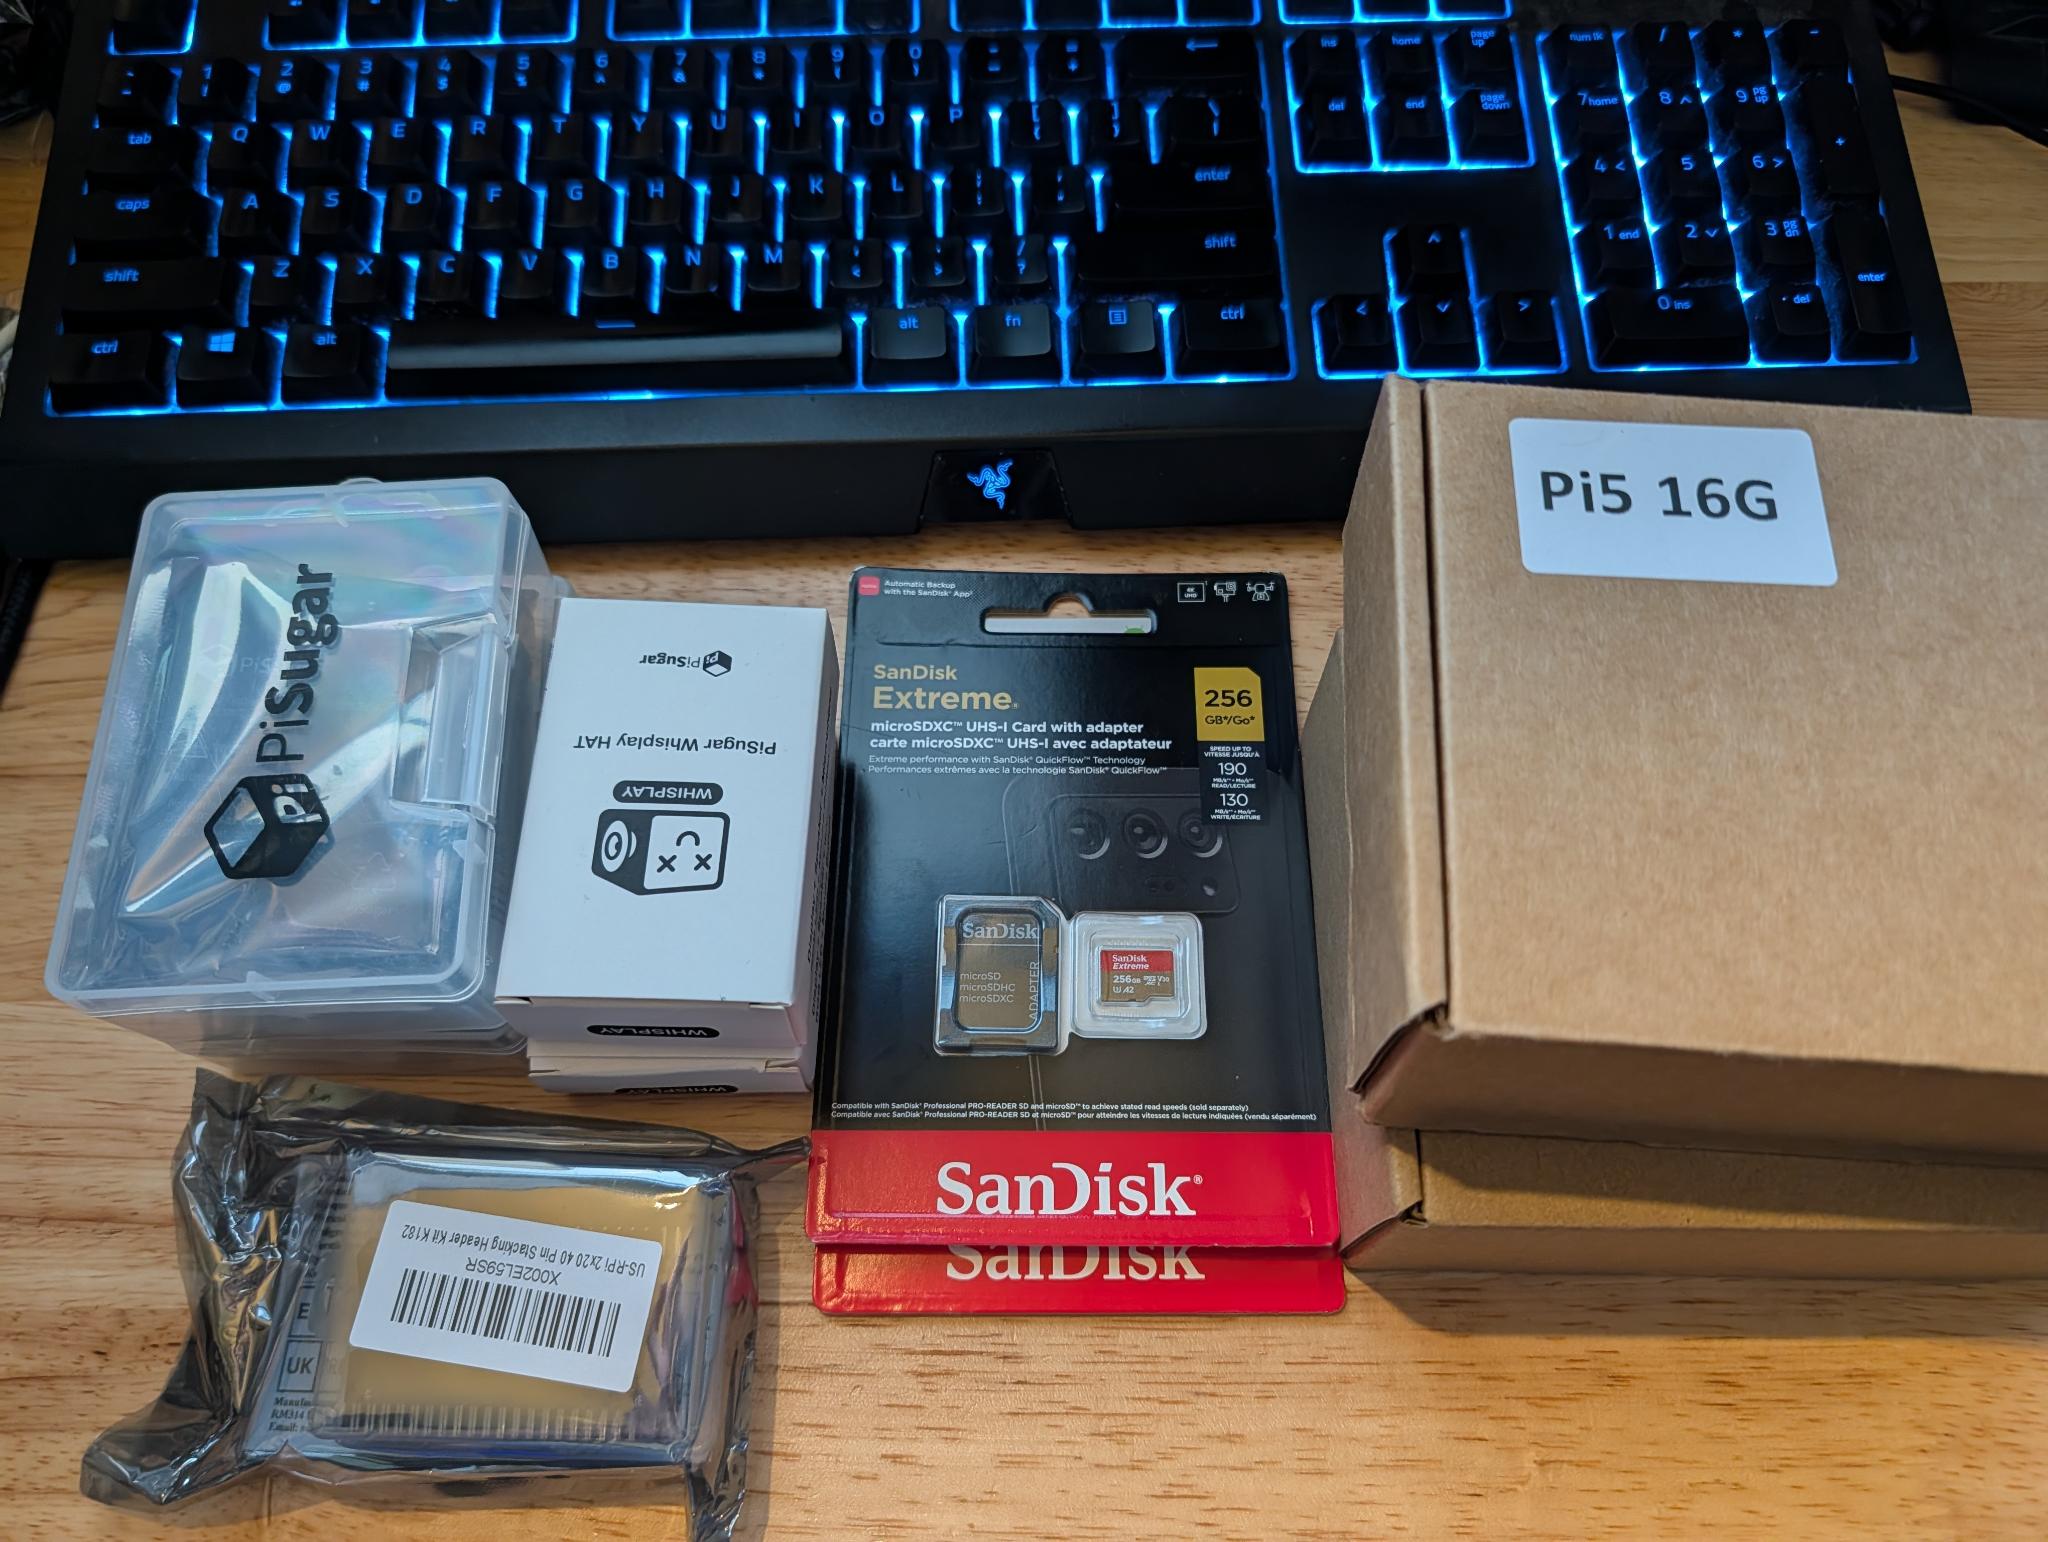
Here are the minimum required parts to make one that will work whether or not you include the upgraded parts later:
- Raspberry Pi 5 - 16GB RAM This kit comes with the heatsink and power supply but none of the unnecessary extras like a case that wont fit with the pieces we’re adding.
- Big, Fast MicroSD Card
- It has to be this specific battery
- Whisplay Hat (screen/scpeaker/mic/button)
- Header Spacers to make everything fit together
- 3D Model of Case to fit everything together
Here is a pre-built image from the manufacturer where everything is already set up: Pre-built Image Simply flash it to your MicroSD card using a tool like balena etcher or rufus and you’re good to go!
If you want to do it all manually, here are the instructions: Manual Setup Instructions
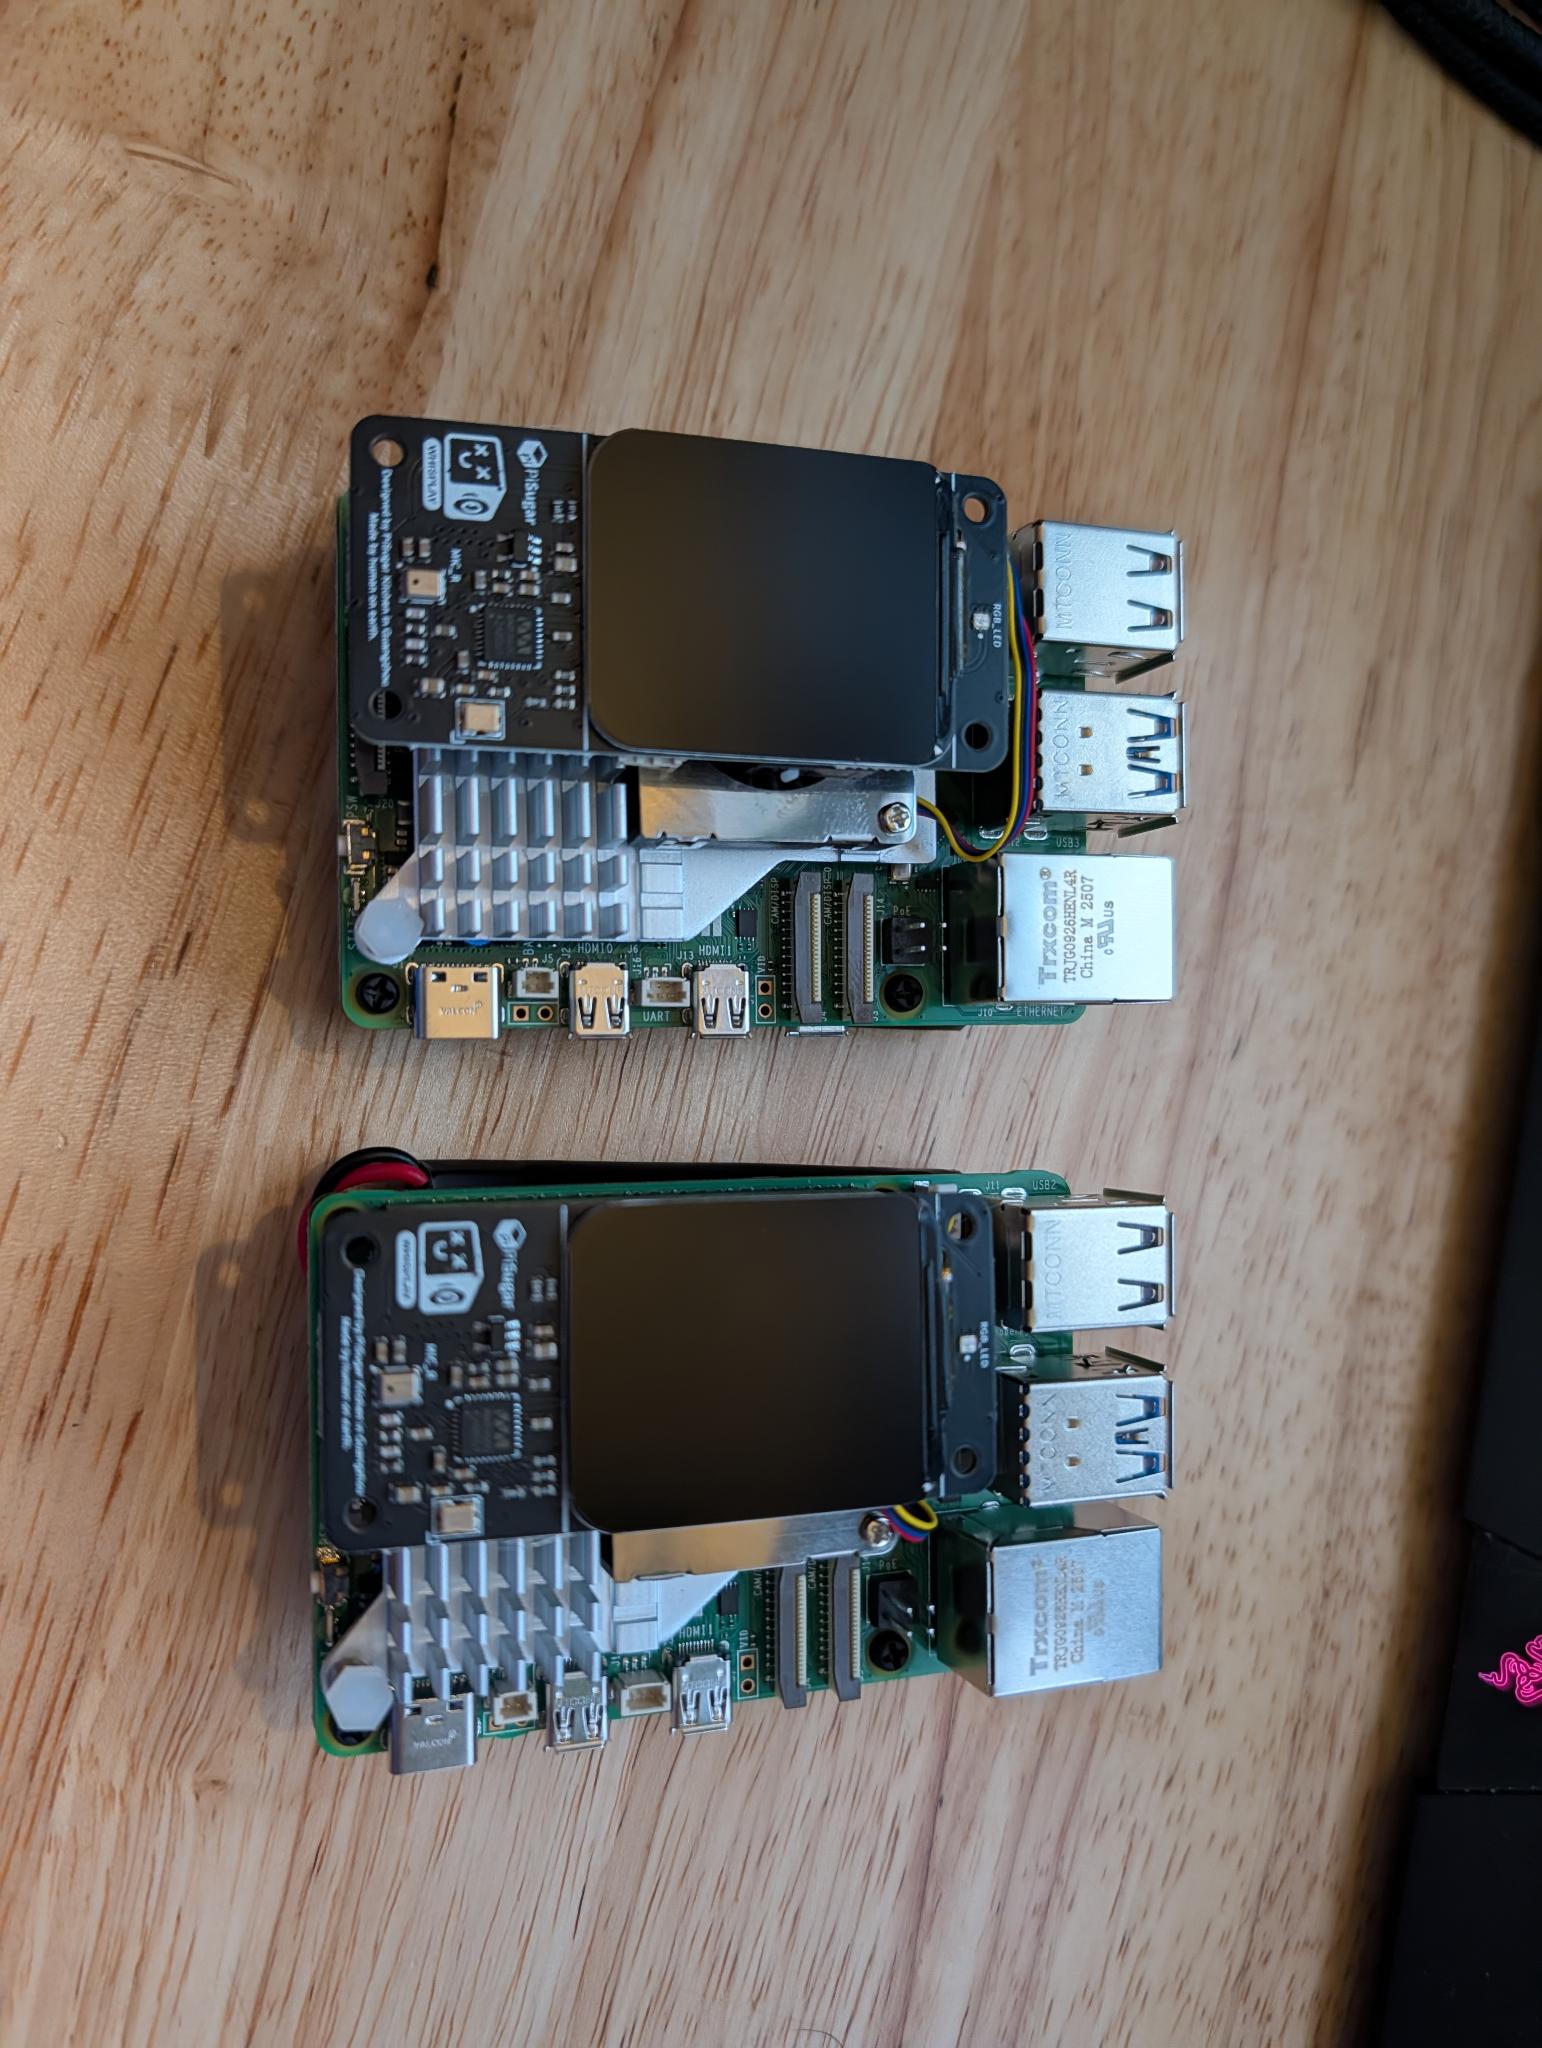
The New Setup: Really Great!
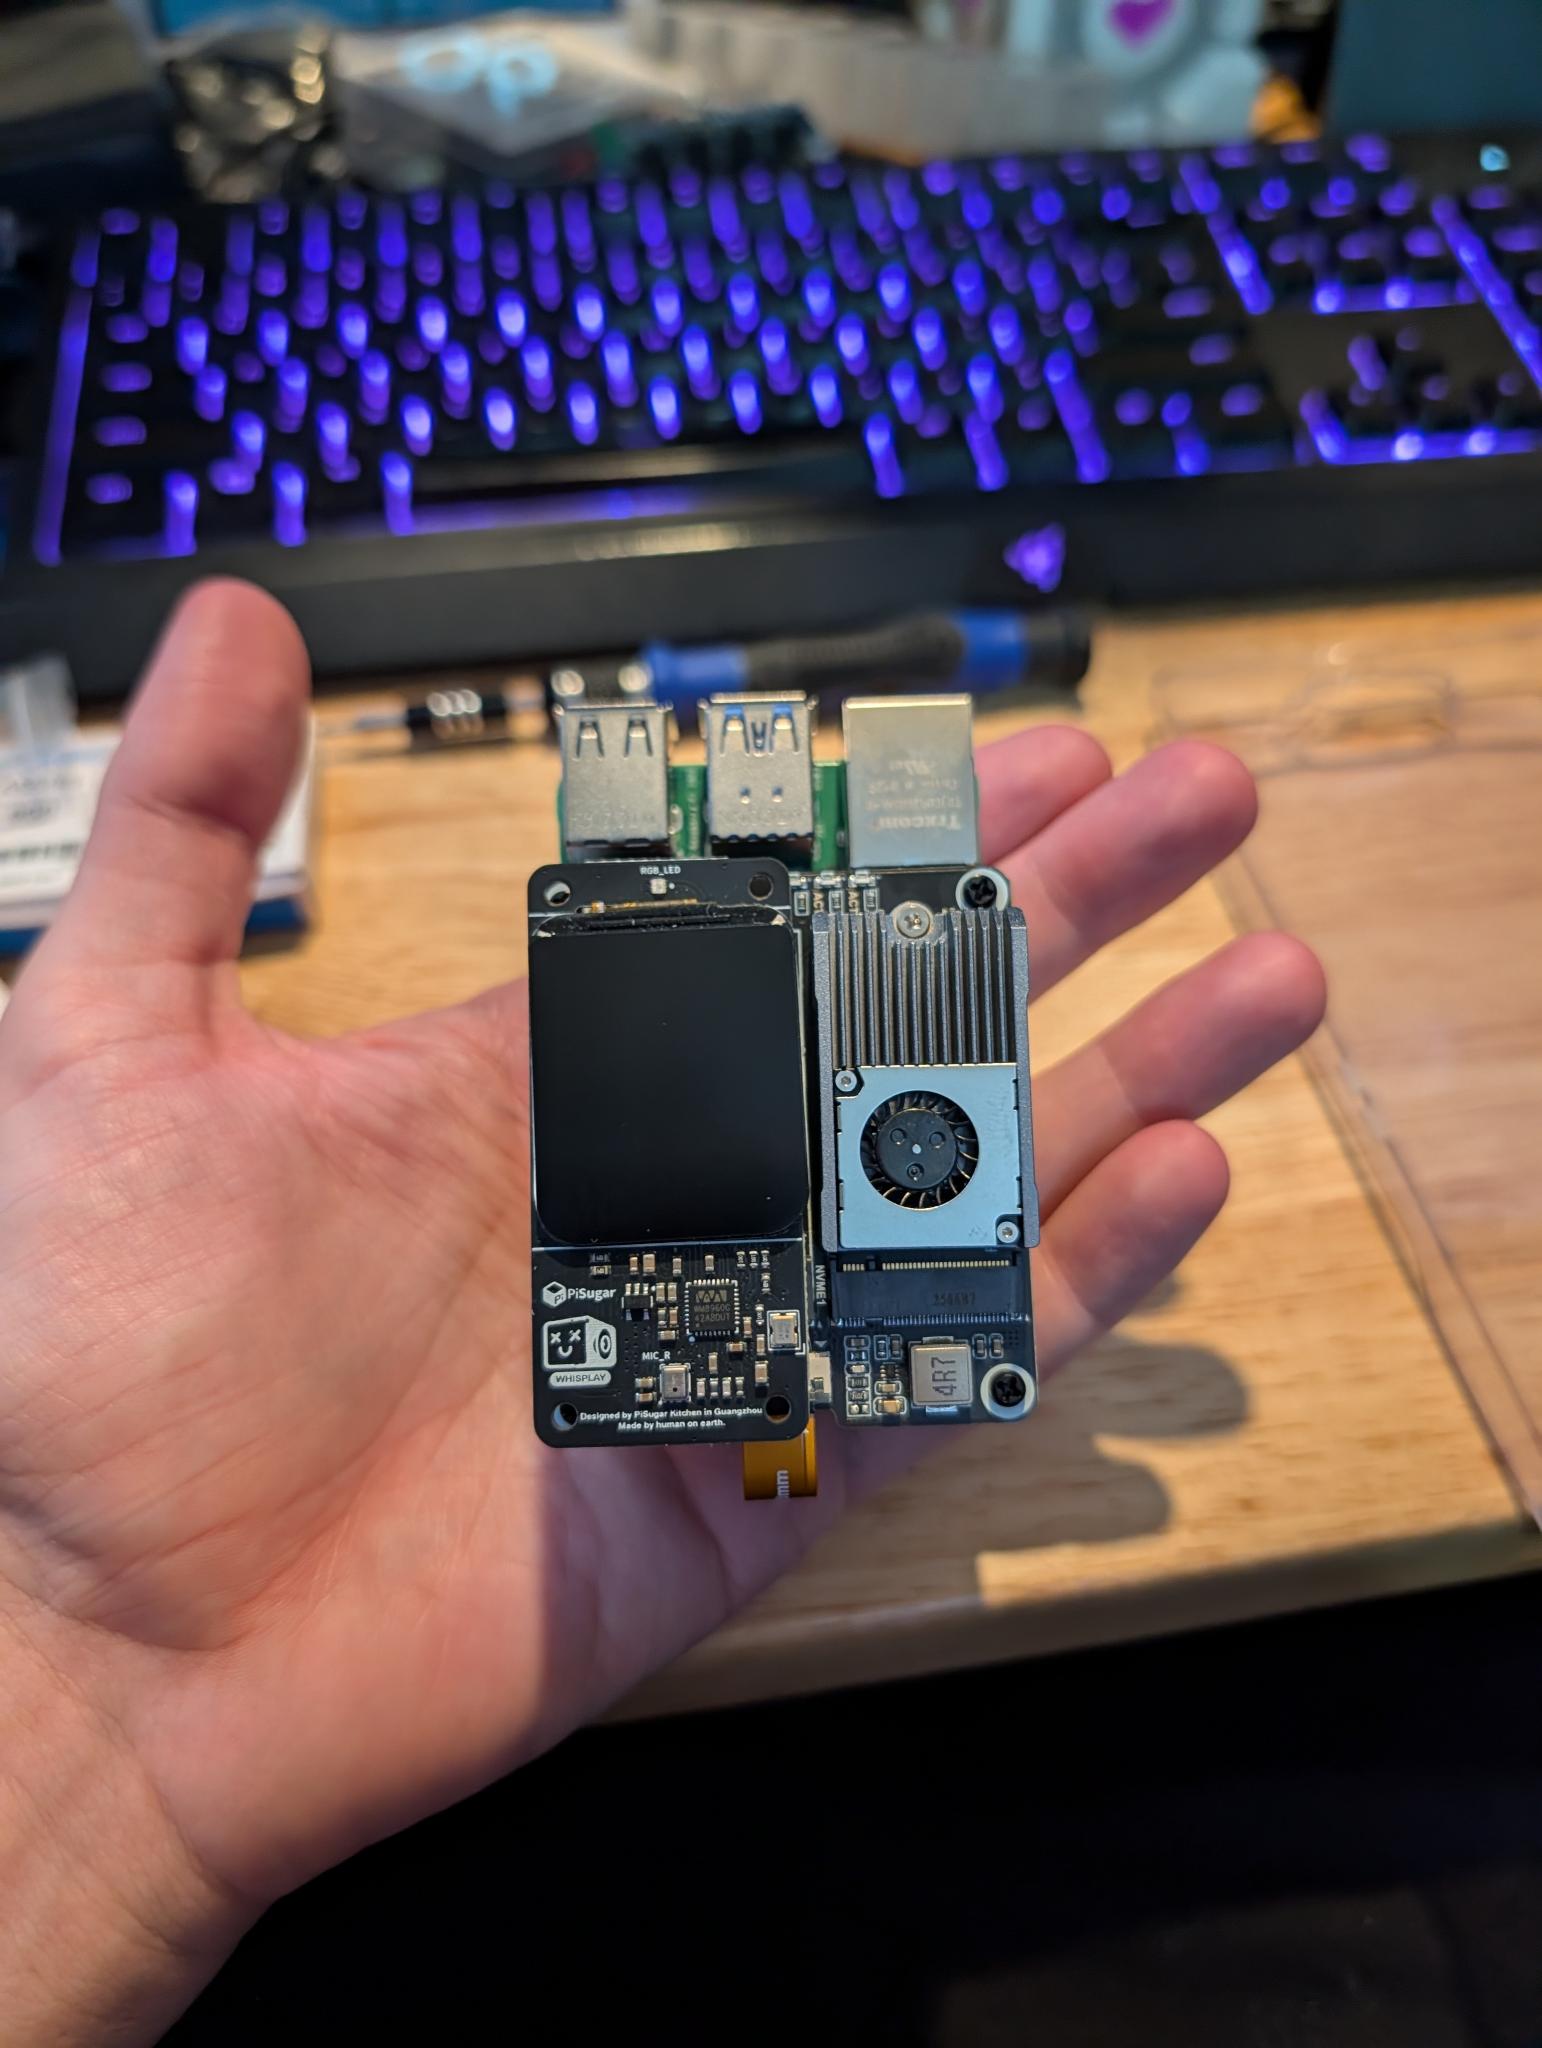
My video about the advanced setup
To make it much faster, you can also add these parts:
Here is a pre-built image from the manufacturer where everything is already set up: Pre-built Image Simply flash it to your MicroSD card using a tool like balena etcher or rufus and you’re good to go!
If you want to do it manually with the LLM8850, here are the manufacturer’s instructions for manual setup: Manual Setup Instructions
Opportunities for Improvement
- Switching to Qwen3-ASR for better voice recognition. This is a new open source model from Alibaba that is much better than the current one from OpenAI, but it requires a bit more setup to get working. If integrated, it would be much faster and more accurate for voice recognition in noisy environments.
- Switching to Qwen3-TTS for better voice generation. This is another new open source model from Alibaba that is much better than the current one. It comes pre-trained with many excellent voices. It also allows cloning voices, so you could have it speak in your own voice or any voice you want. It can also allow editing voices to change whatever aspects of a particular voice you want to change. Again, it requires a bit more setup to get working, but it would be a big improvement in the quality of the voice responses.
Subsequent Update From The Manufacturer
All Seeing Eye
The All-Seeing Eye is a distributed RF observer system designed to map the radio spectrum (literally put all the broadcasts on a geographic map) in real-time. By deploying multiple synchronized nodes (ESP32 + CC1101) in a grid, the system creates a “VLBI Cluster” (Very Long Baseline Interferometry) that correlates signal strength (RSSI) from many locations simultaneously.
A primary goal for this project is that each node should cost just a few dollars to build, making it feasible to quickly and affordably deploy dozens or hundreds of them across a region. They can also integrate with meshtastic nodes to enable cheap and offline regional communication and automated alterts for various undesirable behaviors the nodes may observe ocurring throughout the region.
This allows the system to determine where RF broadcasts are originating from, not by having one powerful sensor, but by combining the partial views of many small, low-cost observers.
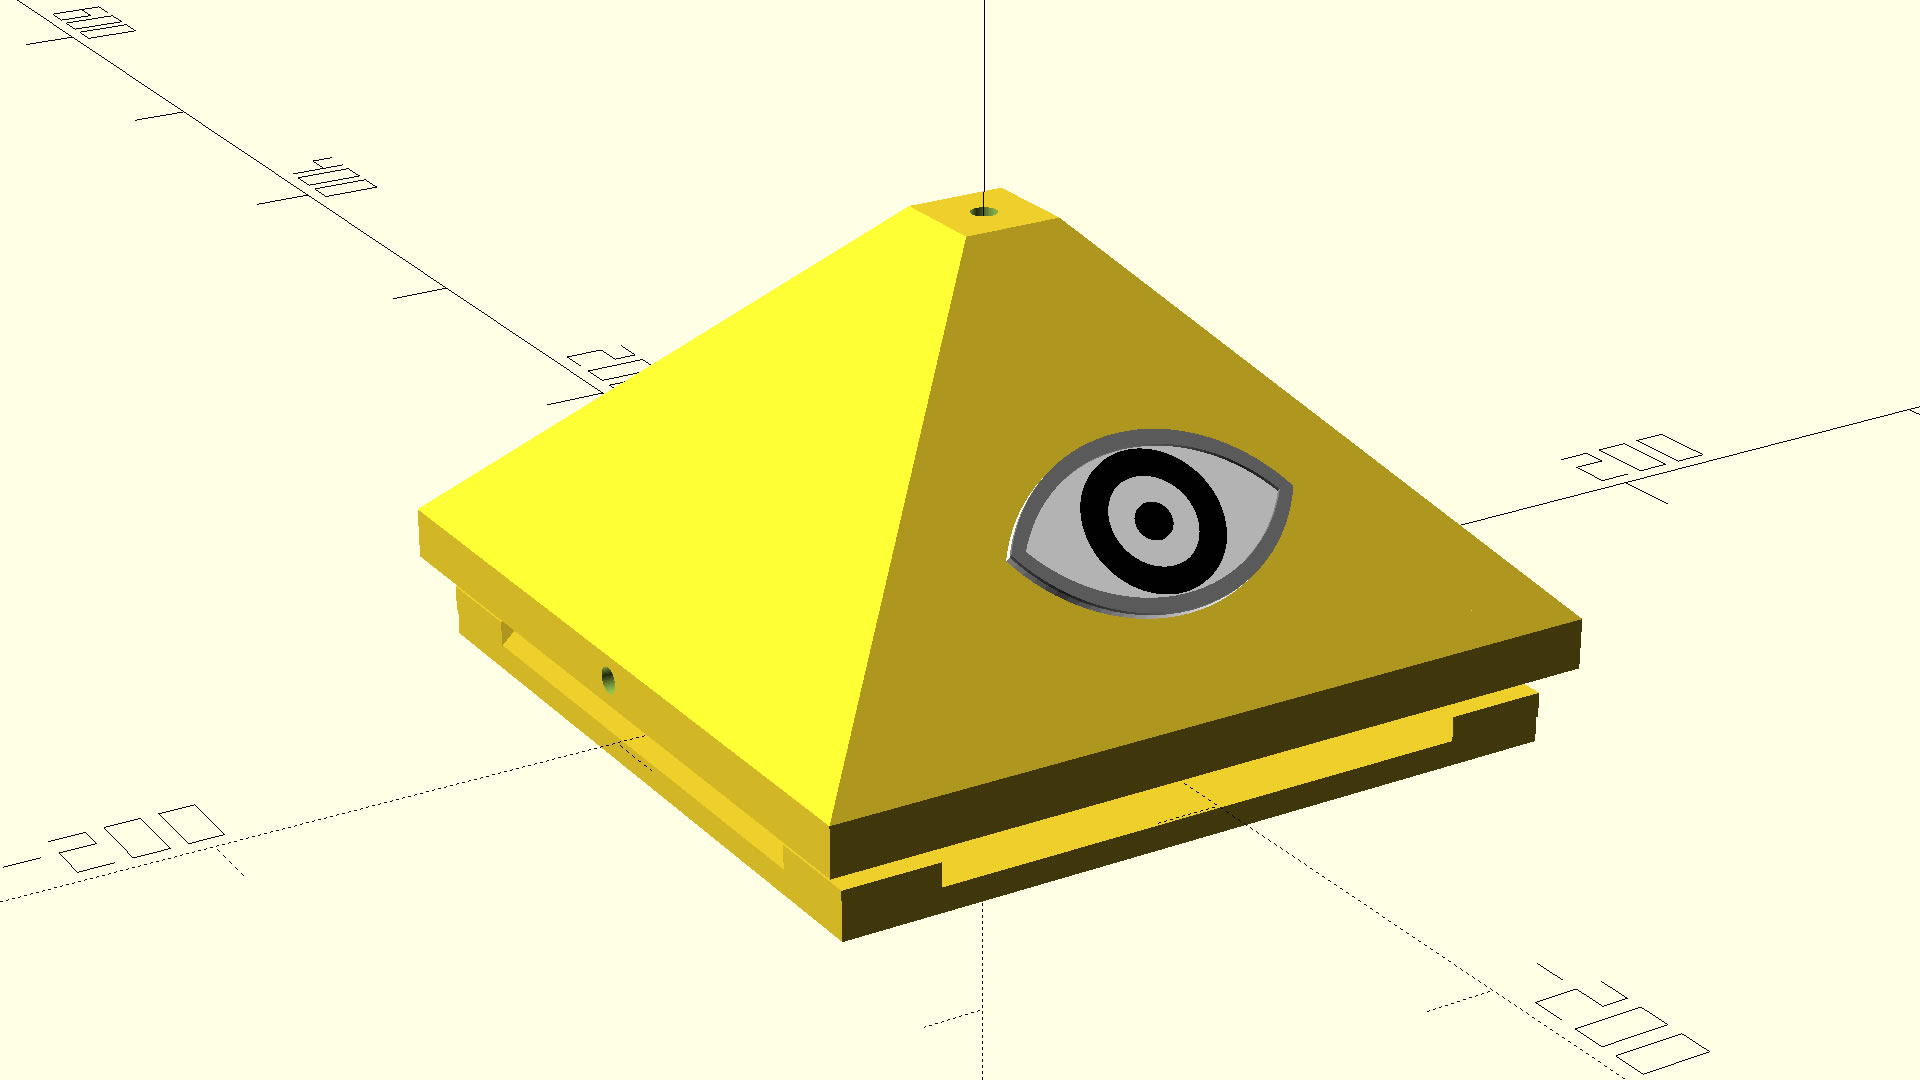
The project involves optionally 3D printing a custom “Pyramid” enclosure with embedded diffusion lighting to represent the node’s “latent awareness.” You can use any container you like, but the pyramid is designed to be visually striking way of separating the antennas enough that they wont interfere with each other while also clearly communciating what the nodes actually do.
Key Features:
- Distributed Sensing: Multiple nodes contribute to a single global map.
- 3D Printed Enclosure: A specialized semi-transparent pyramid design (8” base) with magnetic latches.
- Hardware: ESP32-S3 and CC1101 modules.
- Open Source: All code and 3D models are available on GitHub.
Build List
These are the primary components required to build a single node. These are affiliate links.
- Sparkly semi-transparent purple PLA filament ($19.99)
- I used an AD5M Pro 3D printer which is 10/10. Fully enclosed and filtered. 220x220x250mm build volume. Very easy to use. ($379)
- ESP-32 3-pack with IPX MHF1 connector ($17.99)
- CC1101 module 3-pack ($22.99)
- IPX MHF1 to SMA Cable 5-pack ($8.29)
- Jumper wires (male-female) (there are infinite options here but there are what i used) ($6.98)
- Heltec v3 Meshtastic Node (optional, any meshtastic node with IPX MHF1 connector will do) ($21.99)
- GY-NEO6MV2 GPS Module (optional) ($9.99)
- 2.4ghz wifi antenna 4-pack (optional, any wifi antenna with SMA connector will do) ($8.69)
- 915mhz antenna 2-pack (optional, any 915mhz antenna with SMA connector will do) ($9.99)
- SMA Extensions 2-pack (optional, but its going to hard to fit everything without these $6.99)
- Self-advesive breadboard (optional) $8.99
Source Code
Full design documentation, OpenSCAD models, and firmware source code are available in the repository.

CJ Streams
The official calendar of all the live streams including CJ.
All my streams from now on will be held on Twitch. View The Calendar Here

The High Desert Institute
Building a foundation for the survival of humanity.
Get Involved: GoFundMe: Help Us Build the Cyberpony Express GoFundMe: Help Us Buy Land Join the Discord Always-free Substack
Follow along: Website Bluesky Youtube TikTok
Learn more at the website: High Desert Institute

BWB/SF
Burners Without Borders in the SF Bay Area is working on disaster preparedness and response.
Get Involved: Several new projects being announced soon!
Follow along: Bluesky
Past Projects
Backs up tiktok accounts in case of disasters.
My new homelab architecture
Independent, flat media nonprofit featuring progressive, intersectional perspectives on current events.
All the tools and skills you need for your AI toolbox.
A recorded livestream discussion on ethical issues in generative artificial intelligence featuring CJ Trowbridge, Future Inifinitive, and The Real Cornpop.
Future Projects
Comprehensive Specification for Web-Based Composable Logic App