CJ Trowbridge
Stationary 3D-Printed helicone Weather Satellite Uplink
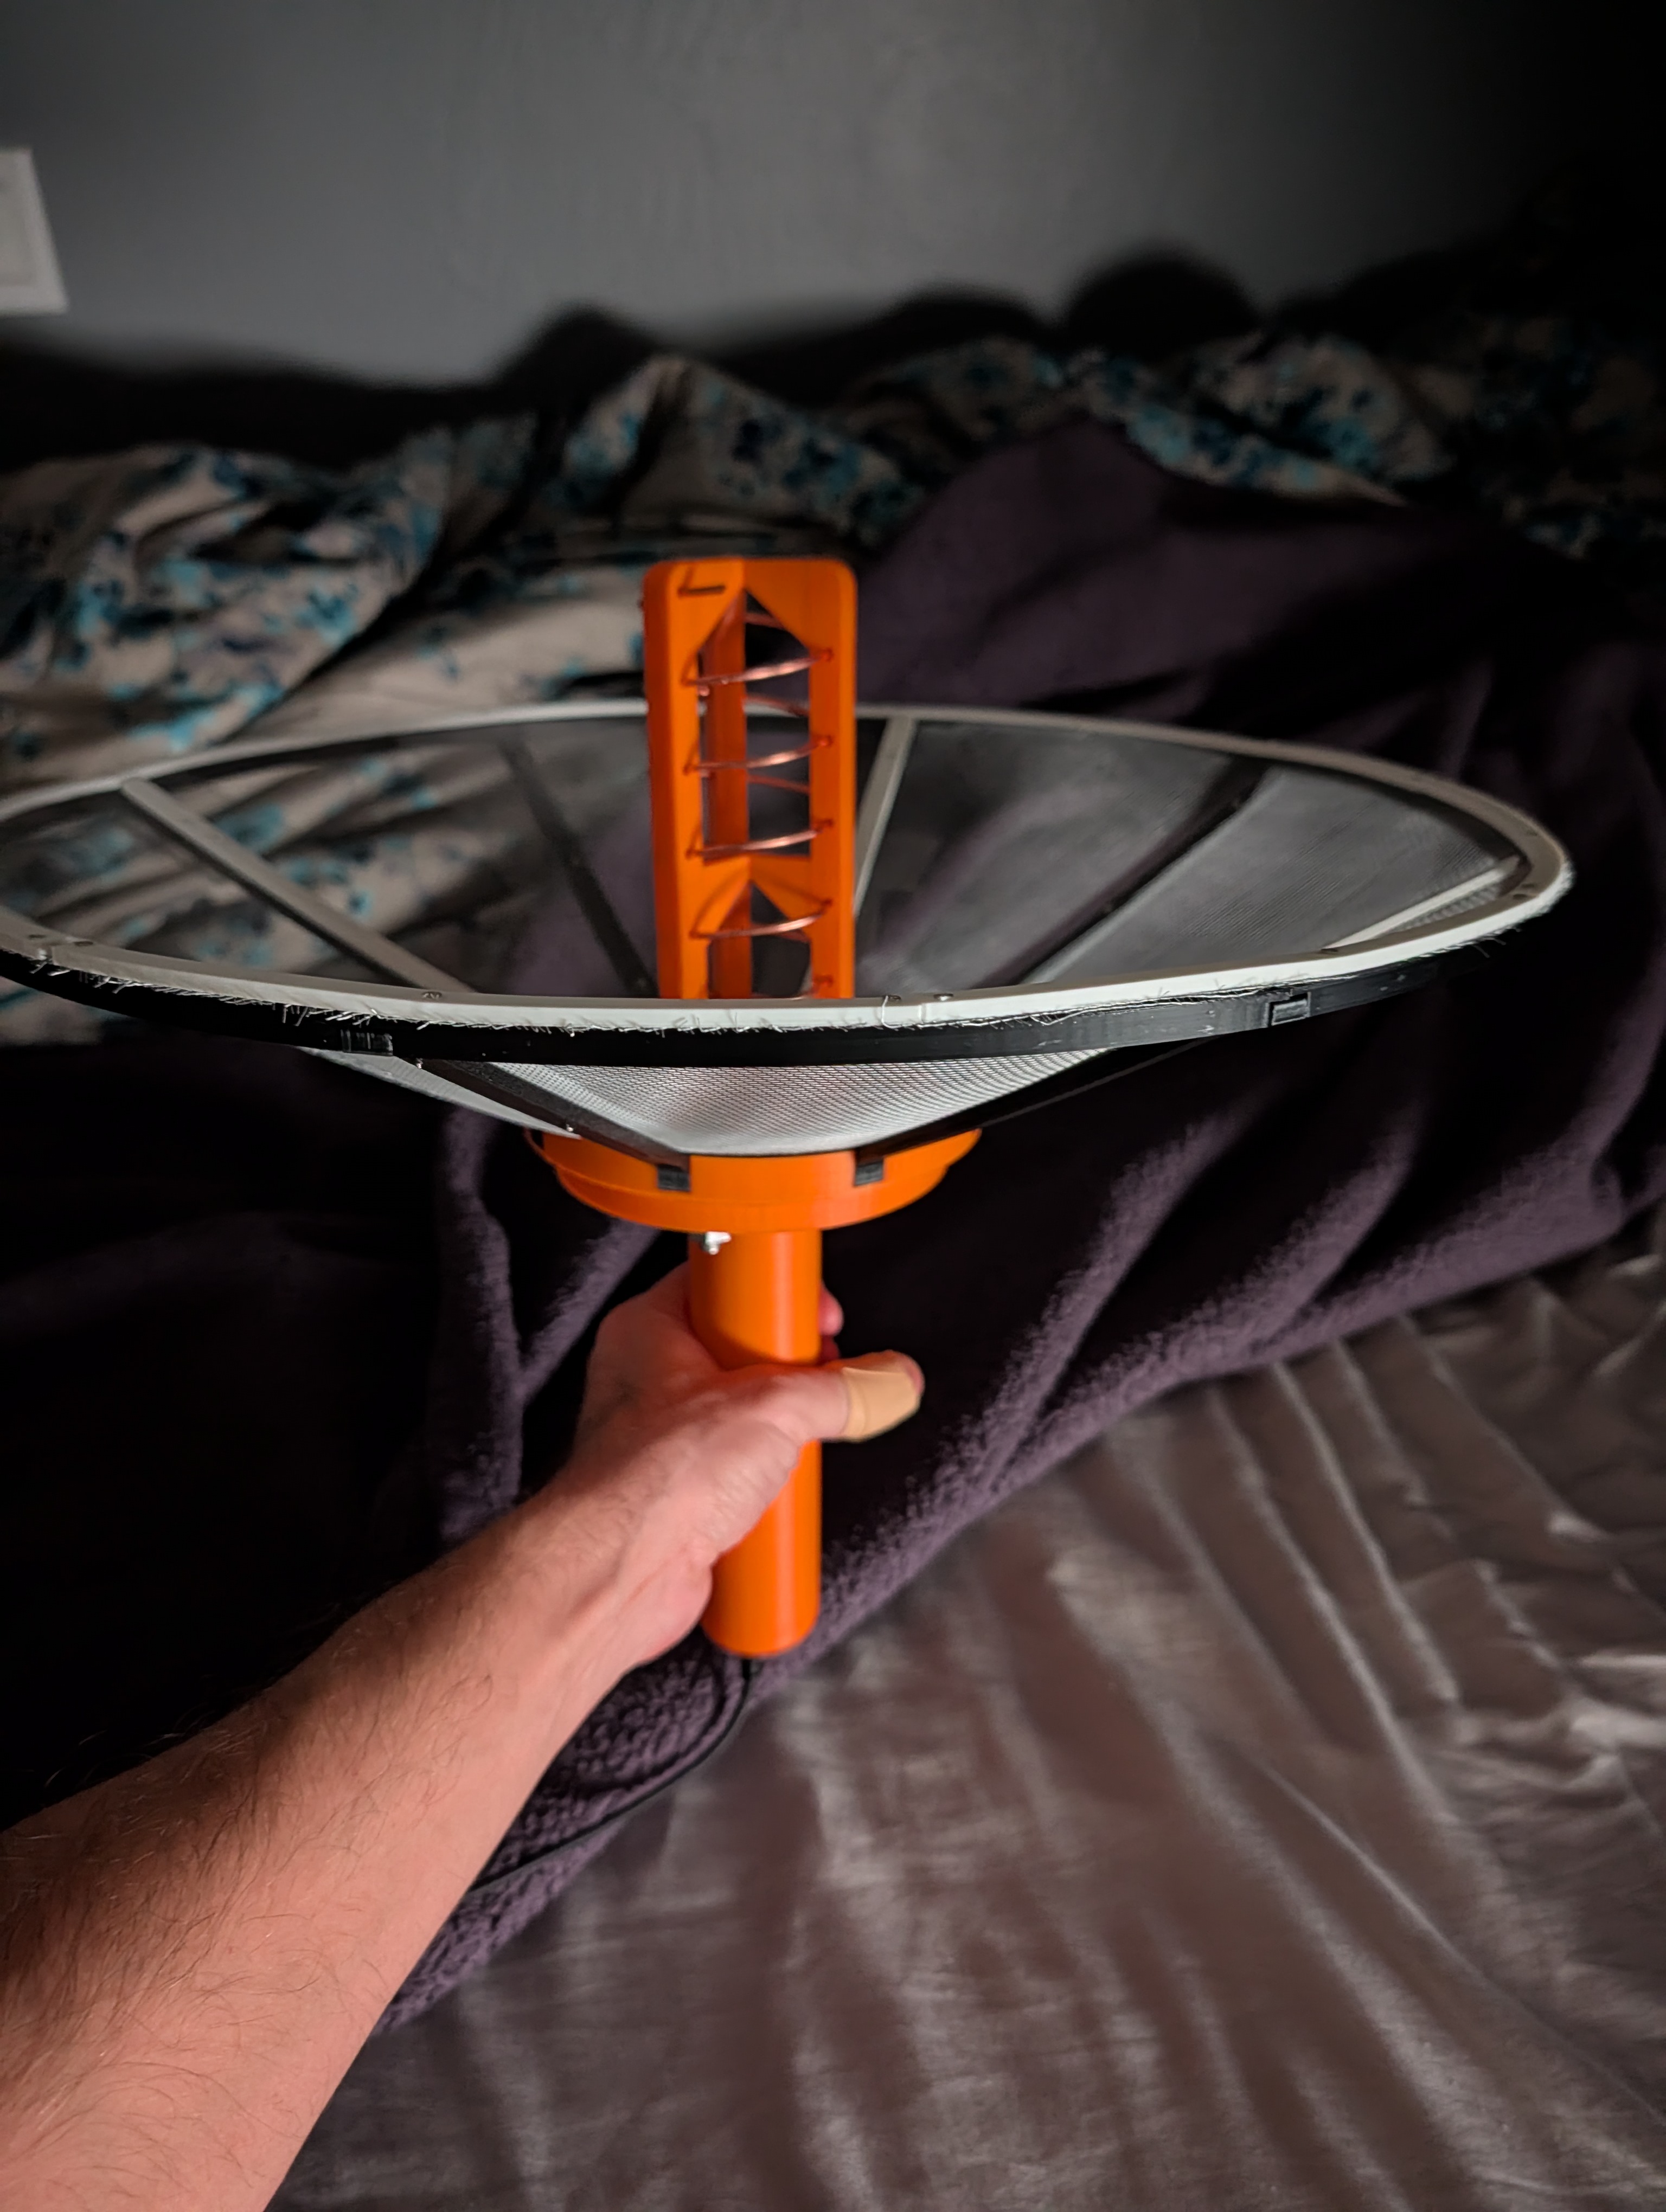
- *Feed type: Helicone (3D-printed)
- Reflector type: Parabolic dish (Aluminum Window Screen)
- Alignment mechanism: Stationary (fixed mount after initial pointing)
This is an uplink for connecting to the GOES weather satellites using a 3D-printed helicone feed antenna with an integrated parabolic dish reflector and LNA. The helical feed is designed to be mounted on a fixed, stationary mount that is manually pointed at the satellite. This allows me to receive real-time weather forecasts, photography, and emergency alerts directly from space without needing an internet connection.
The Project
I wanted to try duplicating the popular open-source Helicone project as a baseline reference to test my other ideas against.
This is the 3d model.
If you don’t want to 3d print this one, you can also buy a GOES antenna that’s ready to go, but the feed will not be as good as the 3d printed one.
Here is the parts list:
- Solid-core 6mm^2 copper wire for the helicone elements. I used 6mm^2 because it is the closest standard size to the ideal diameter for the GOES frequency.
- SMA flange to mount the feed to the dish and connect the LNA.
- M8 bolts, nuts, and washers to secure the feed to the dish.
- Assorted self-tapping M2 screws
- Special Low Noise Amplifier (LNA) designed for the GOES satellite frequency.
- RTL-SDR dongle to receive the satellite signal.
- Raspberry Pi Zero 2W to run rtl_tcp and stream data to my main computer, running SatDump and goestools
- Battery pack For Raspberry Pi to power the receiver in the field. These are great.
- Memory card For Raspberry Pi to store the OS and software.
Software
- Raspberry Pi OS Lite for the Raspberry Pi Zero 2W.
- rtl_tcp to stream the raw IQ data from the RTL-SDR to my main computer.
- SatDump to decode the IQ data and extract the weather data and images from the GOES satellite signal.
- goestools for additional processing and analysis of the GOES data.
Other examples
This 3D-Printed Satellite Antenna Is Fantastic!
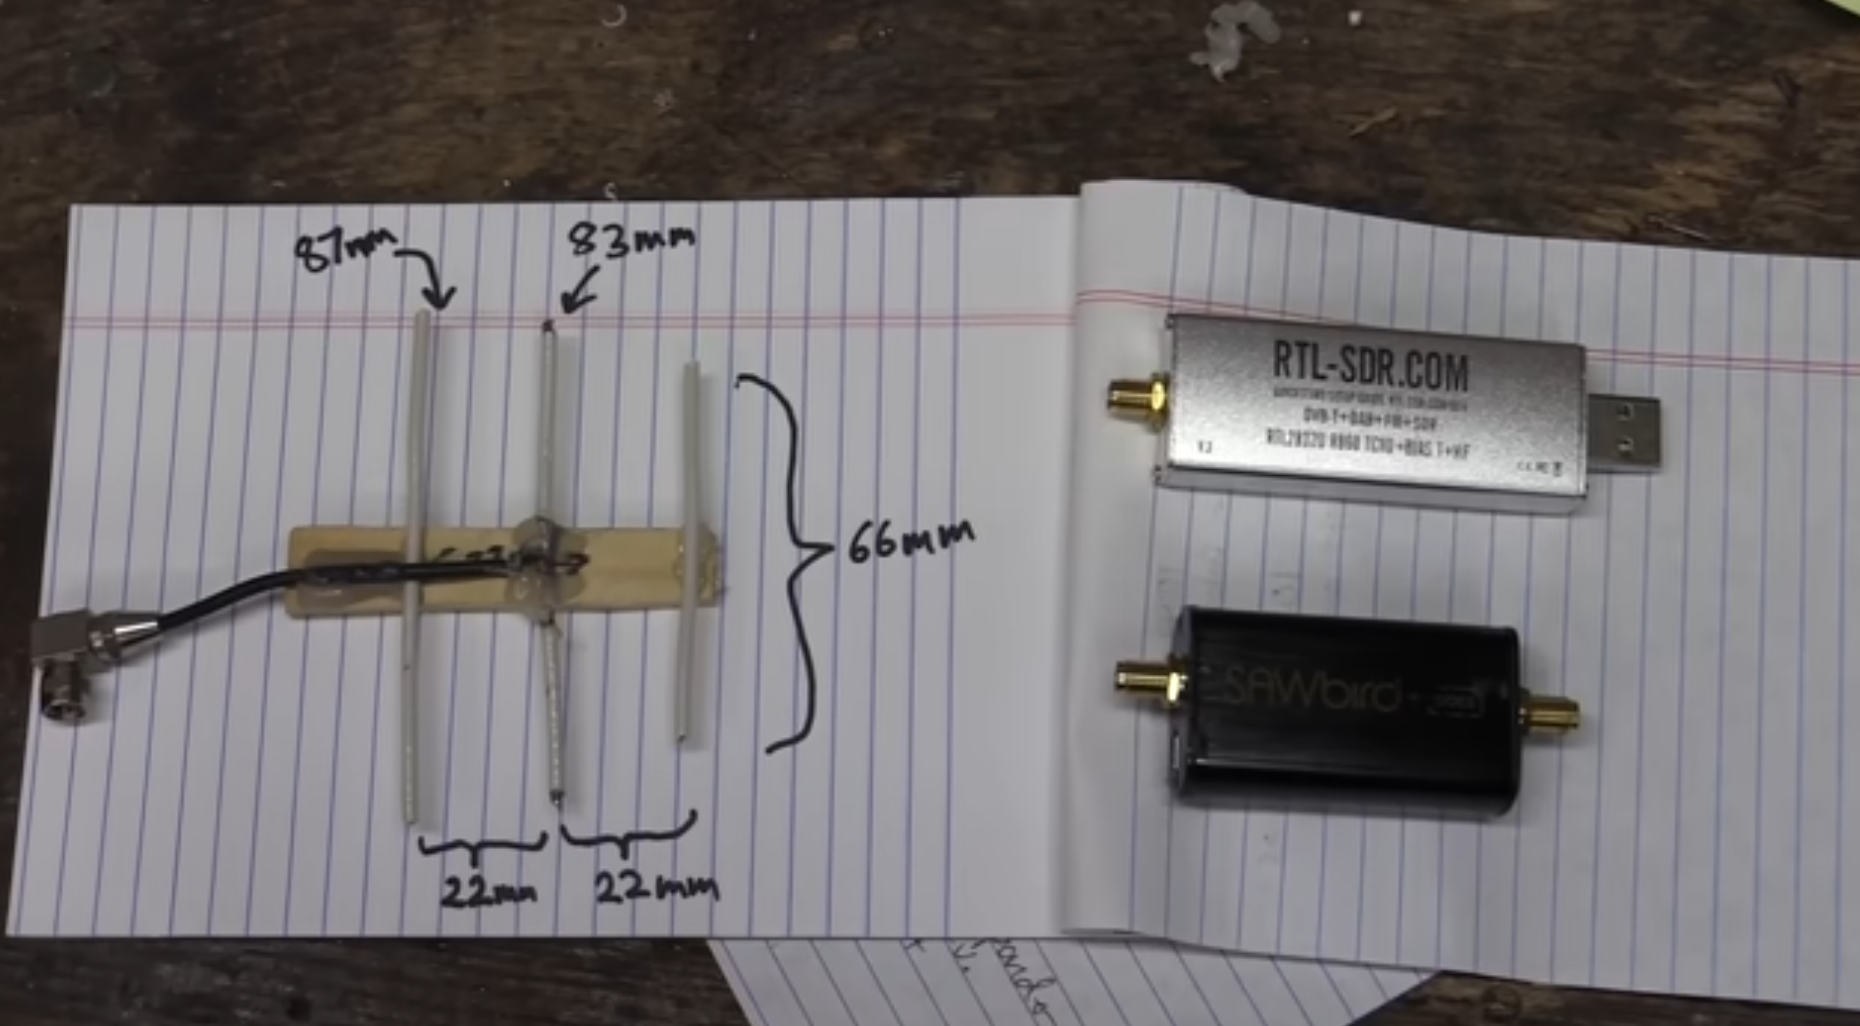
3D Printed Yagi
There was another popular community design for a linear-polarized yagi antenna which the community iterated on and improved over time. The yagi is only about half as good as the helicone because it doesn’t have the right polarization, but it’s much easier to make and can fit inside the small robotic rv dishes which are much easier to find and work with than the large parabolic dishes. It still needs a filter and low-noise amplifier (black) connected immediately after the feed to be able to receive the signal and send it on to the software defined radio (silver), but it’s a great option for a smaller feed that will fit in those small domes that go on the roof of rv’s and boats.
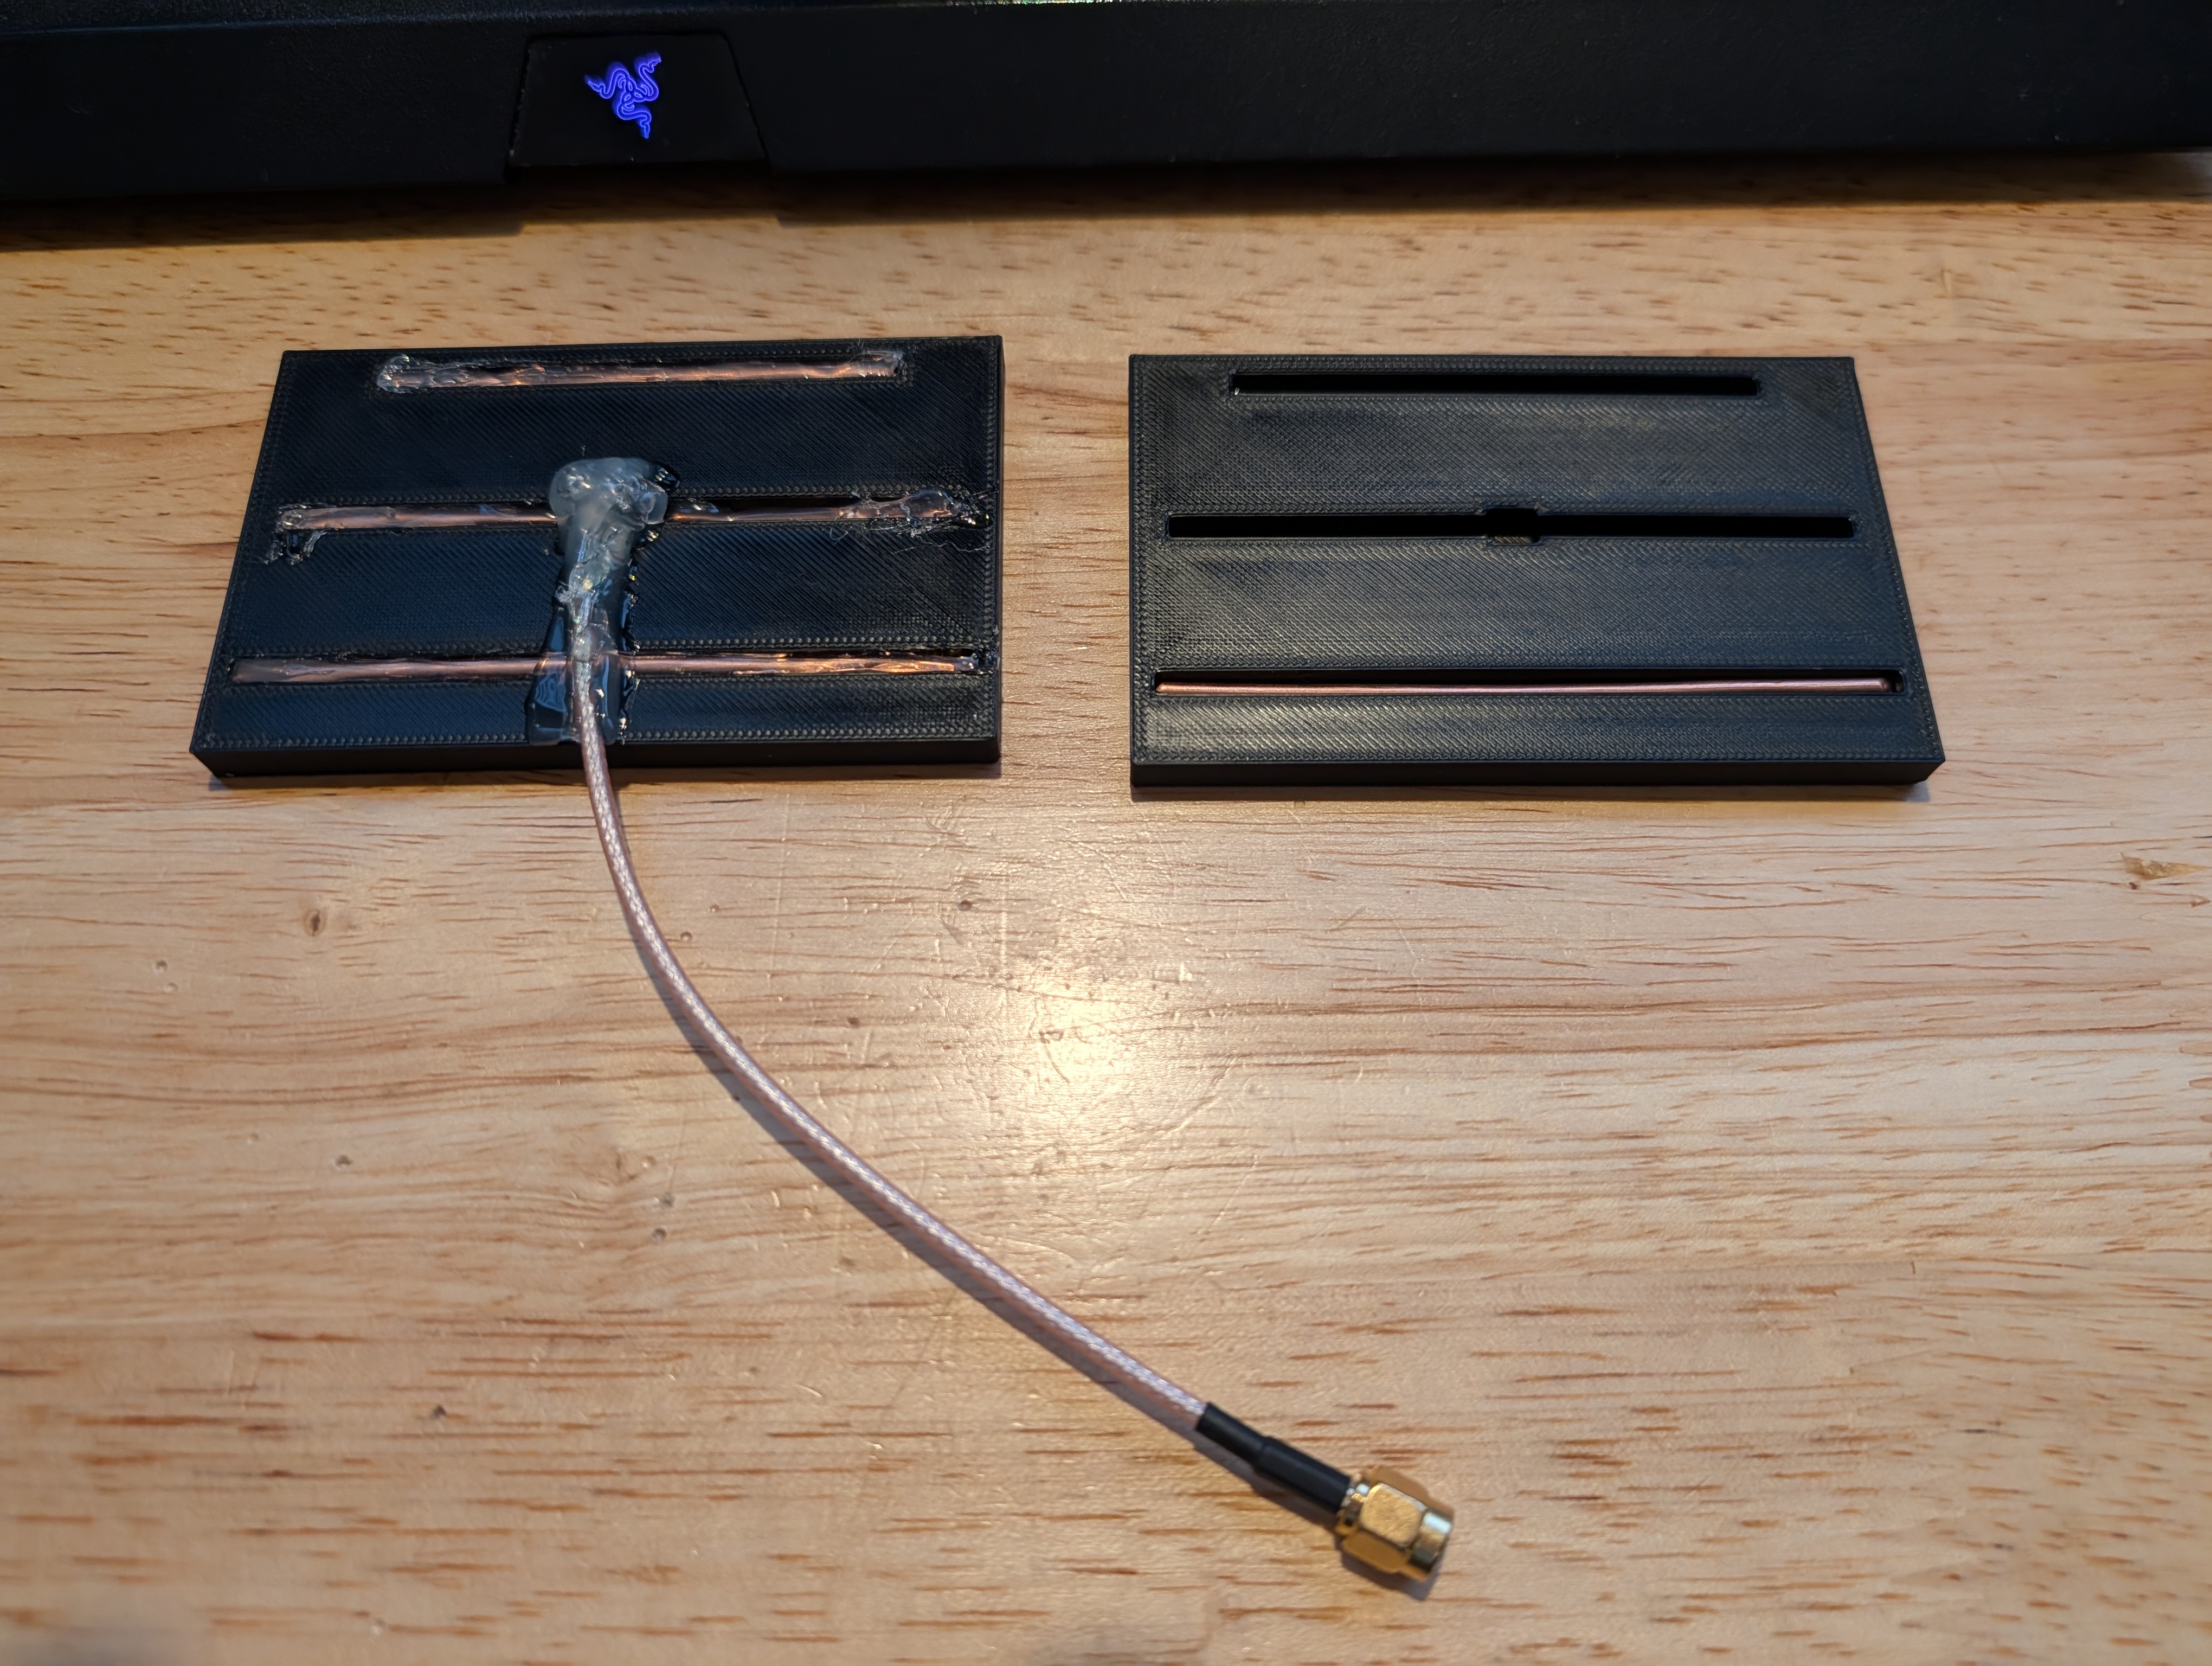
My 3D Printed Version
The math behind making a yagi antenna is complex and I have absolutely no understanding of how that works. I gave the photo above to an LLM and asked it to research and find all the information to explain why this feed is so effective. It’s actually a counter-intuitive design. The first thing you will notice is that the front element is too short. normally, the elements in a yagi are closer to the same length. It turns out, the community discovered that being at the focal point of a dish, this approach is more effective at focusing the signal than a more traditional yagi design. One common pitfall with yagis is that the elements can bend, especially when you’re using copper wire that comes ina coil. My idea was to 3d print a “negative” of the antenna so I can just drop all the lengths of copper wire into the grooves and hit them with some hot glue to hold them in place. This worked really well and made it much easier to get the elements in the right place, aligned perfectly, and keep them from bending.
If you’re interested in my pipeline or artifacts for the 3D printed yagi antenna which isn’t as good as the helicone but much easier to make and much more versatile with being able to fit inside the small robotic rv dishes, you can check out the 3D printed Yagi project